Tạo Private Windows EC2
Tạo Private EC2 Windows
Bạn tham khảo cách tạo EC2 Windows
-
Truy cập giao diện quản trị dịch vụ EC2
- Click Instances.
- Click Launch instances.
-
Tại mục Name and tags
- Đặt tên cho instance:
Private Windows Instance
- Đặt tên cho instance:
-
Tại trang Amazon Machine Image (AMI).
- Kéo chuột xuống phía dưới.
- Click Select để lựa chọn AMI Microsoft Windows Server 2019 Base.

-
Tại mục Instance Type.
- Click chọn Instance type t2.micro.
-
Tại mục Key Pair (login).
- Click chọn key pair bạn đã tạo trước đó.
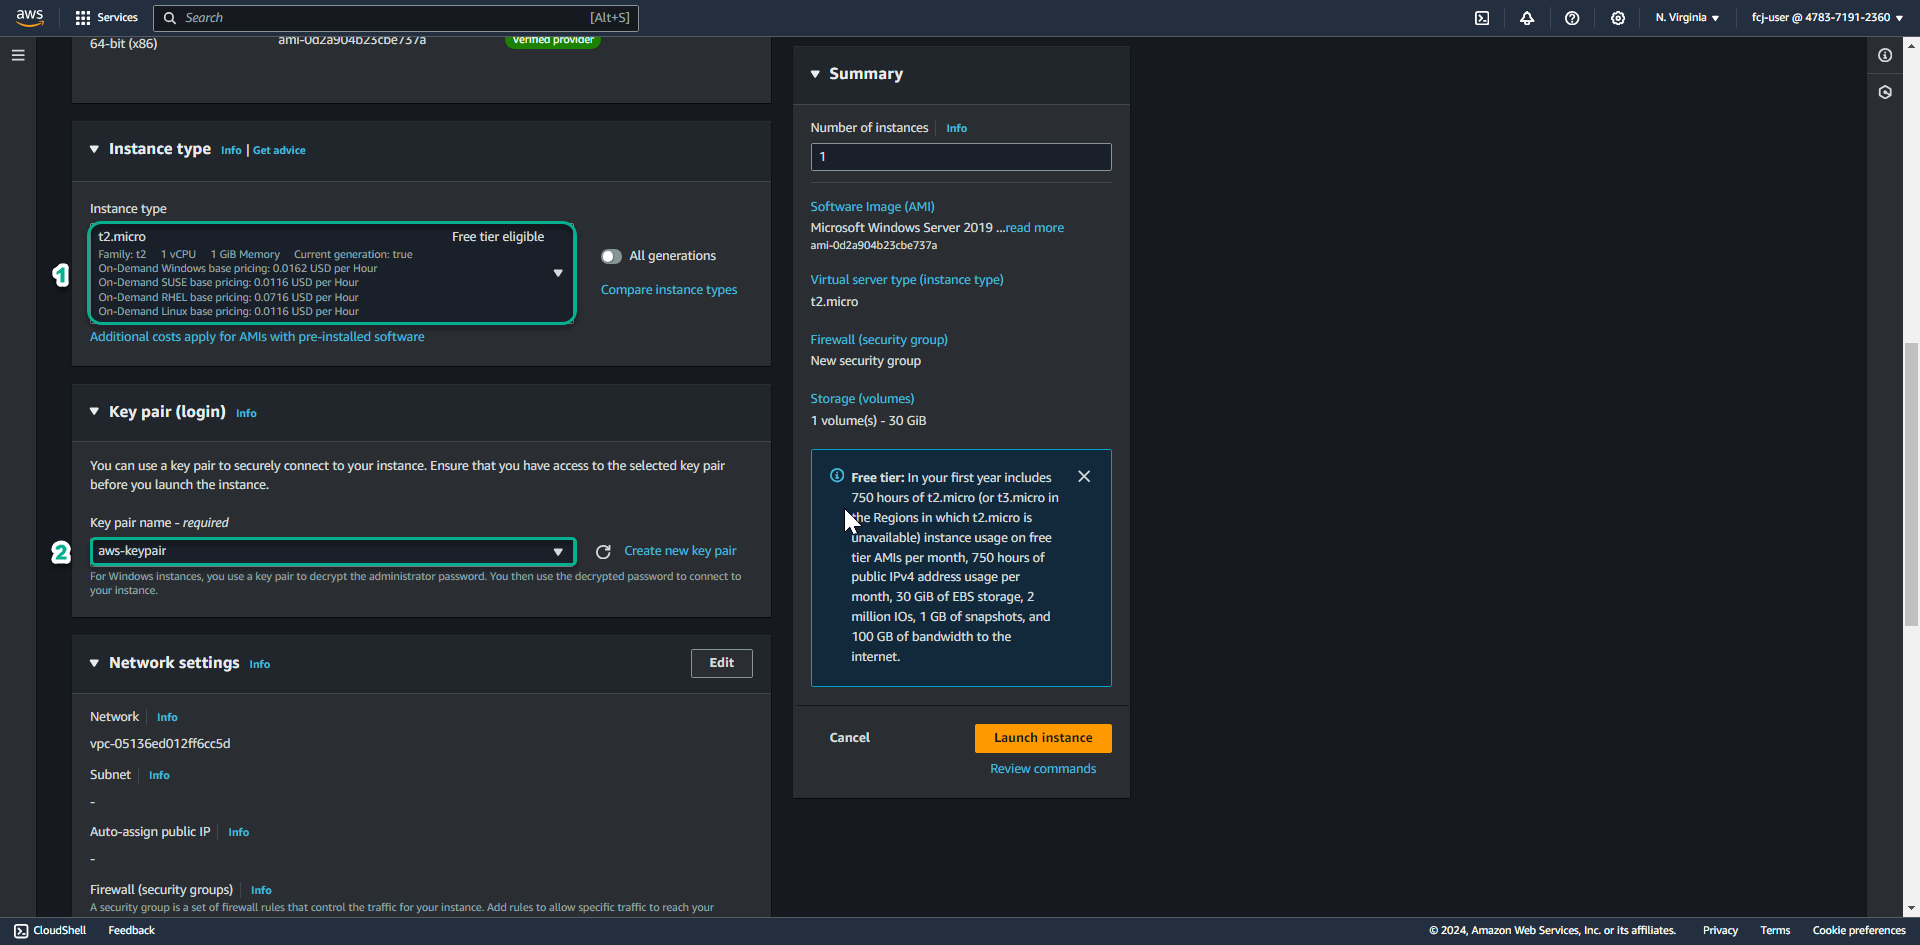
- Click chọn key pair bạn đã tạo trước đó.
-
Tại mục Network setting
- Tại mục Network chọn Lab VPC.
- Tại mục Subnet chọn Lab Private Subnet.
- Tại mục Auto-assign Public IP chọn Use subnet setting (Disable)
- Tại mục Firewall (security group), chọn select existing security group
- Tại mục Common security group, chọn SG Private Windows Instance
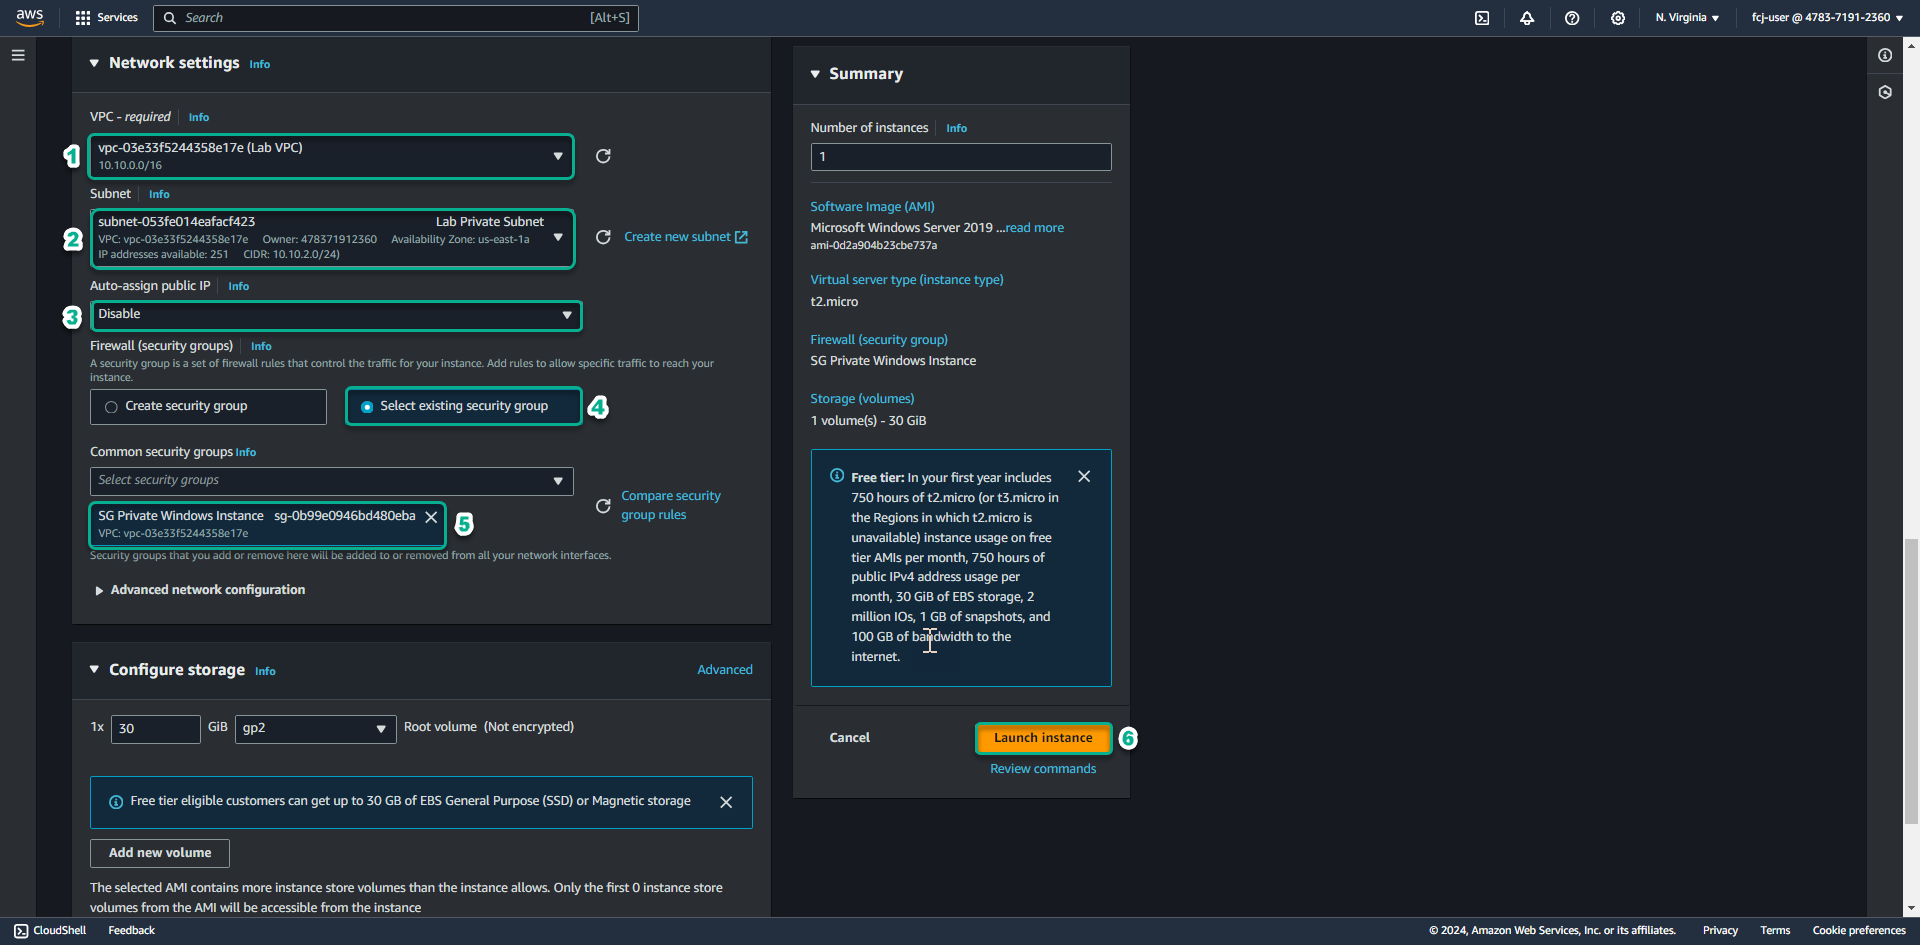
- Tại mục Common security group, chọn SG Private Windows Instance
-
Click Launch Instances để tạo máy chủ EC2.
-
Click View Instances để quay lại danh mục EC2 instances. Tiếp theo chúng ta sẽ tiến hành tạo các IAM Role để phục vụ cho Session Manager.