Create Public Subnet
Create Public Subnet
-
Click Subnets.
- Click Create subnet.
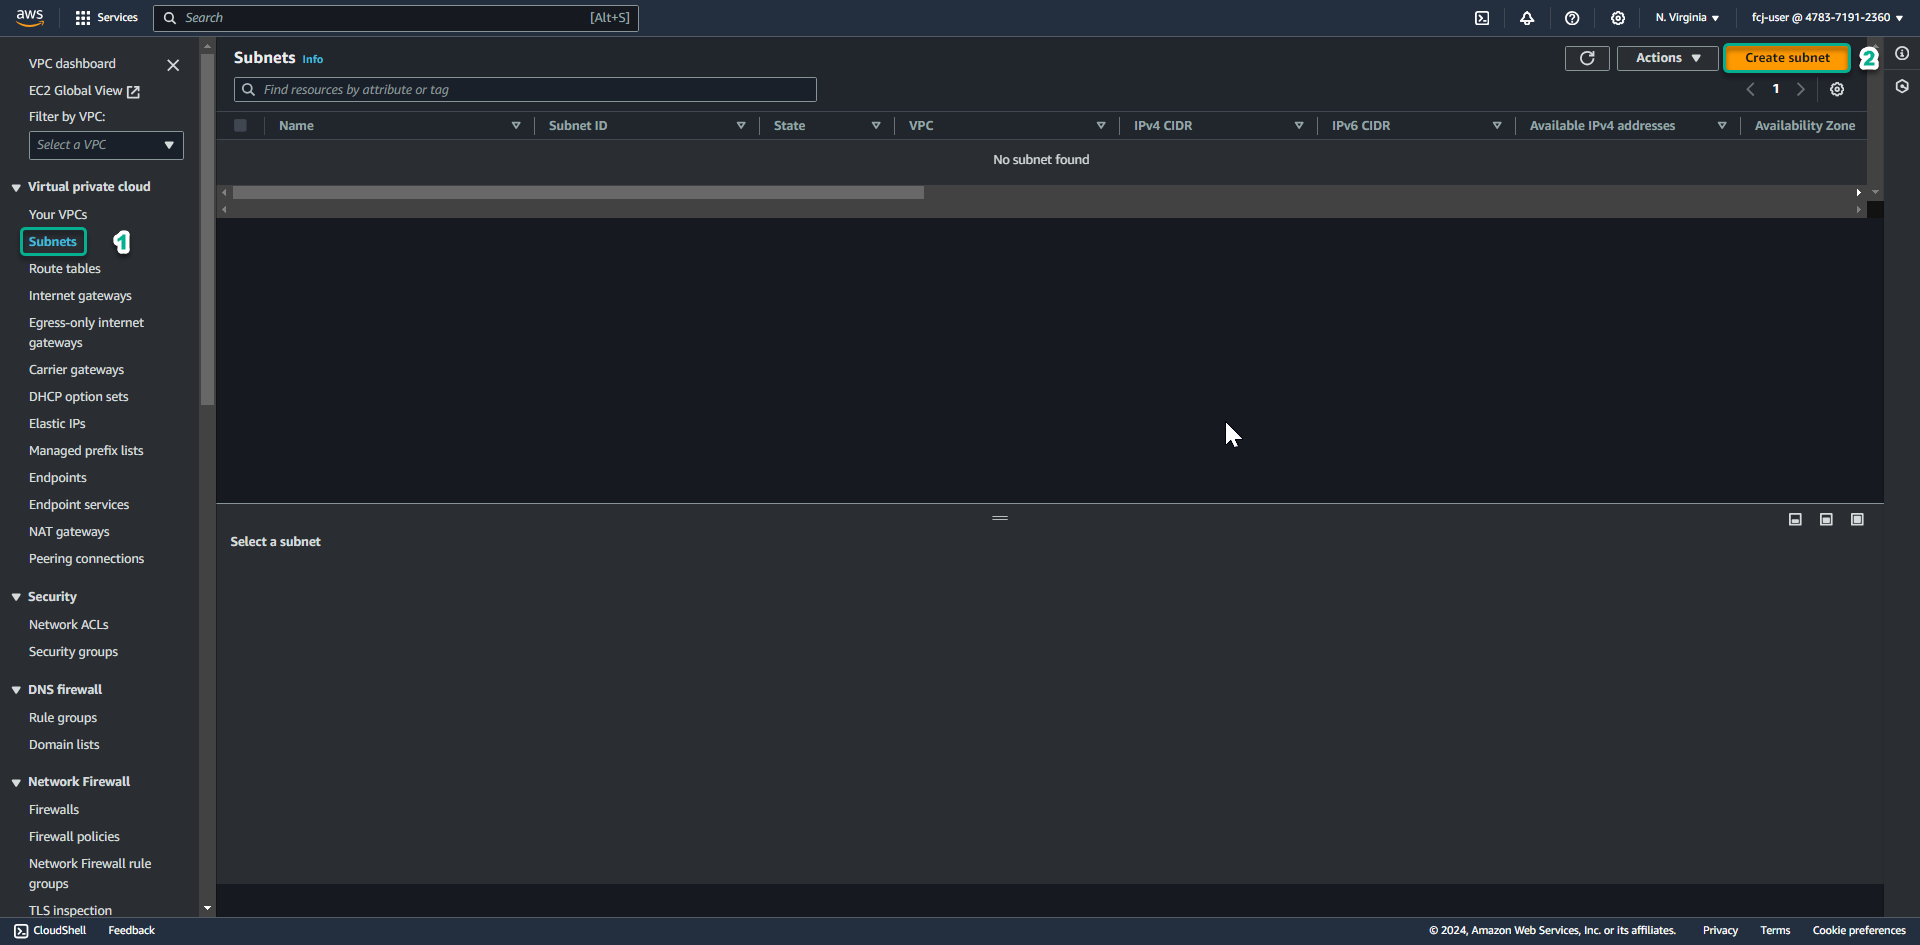
- Click Create subnet.
-
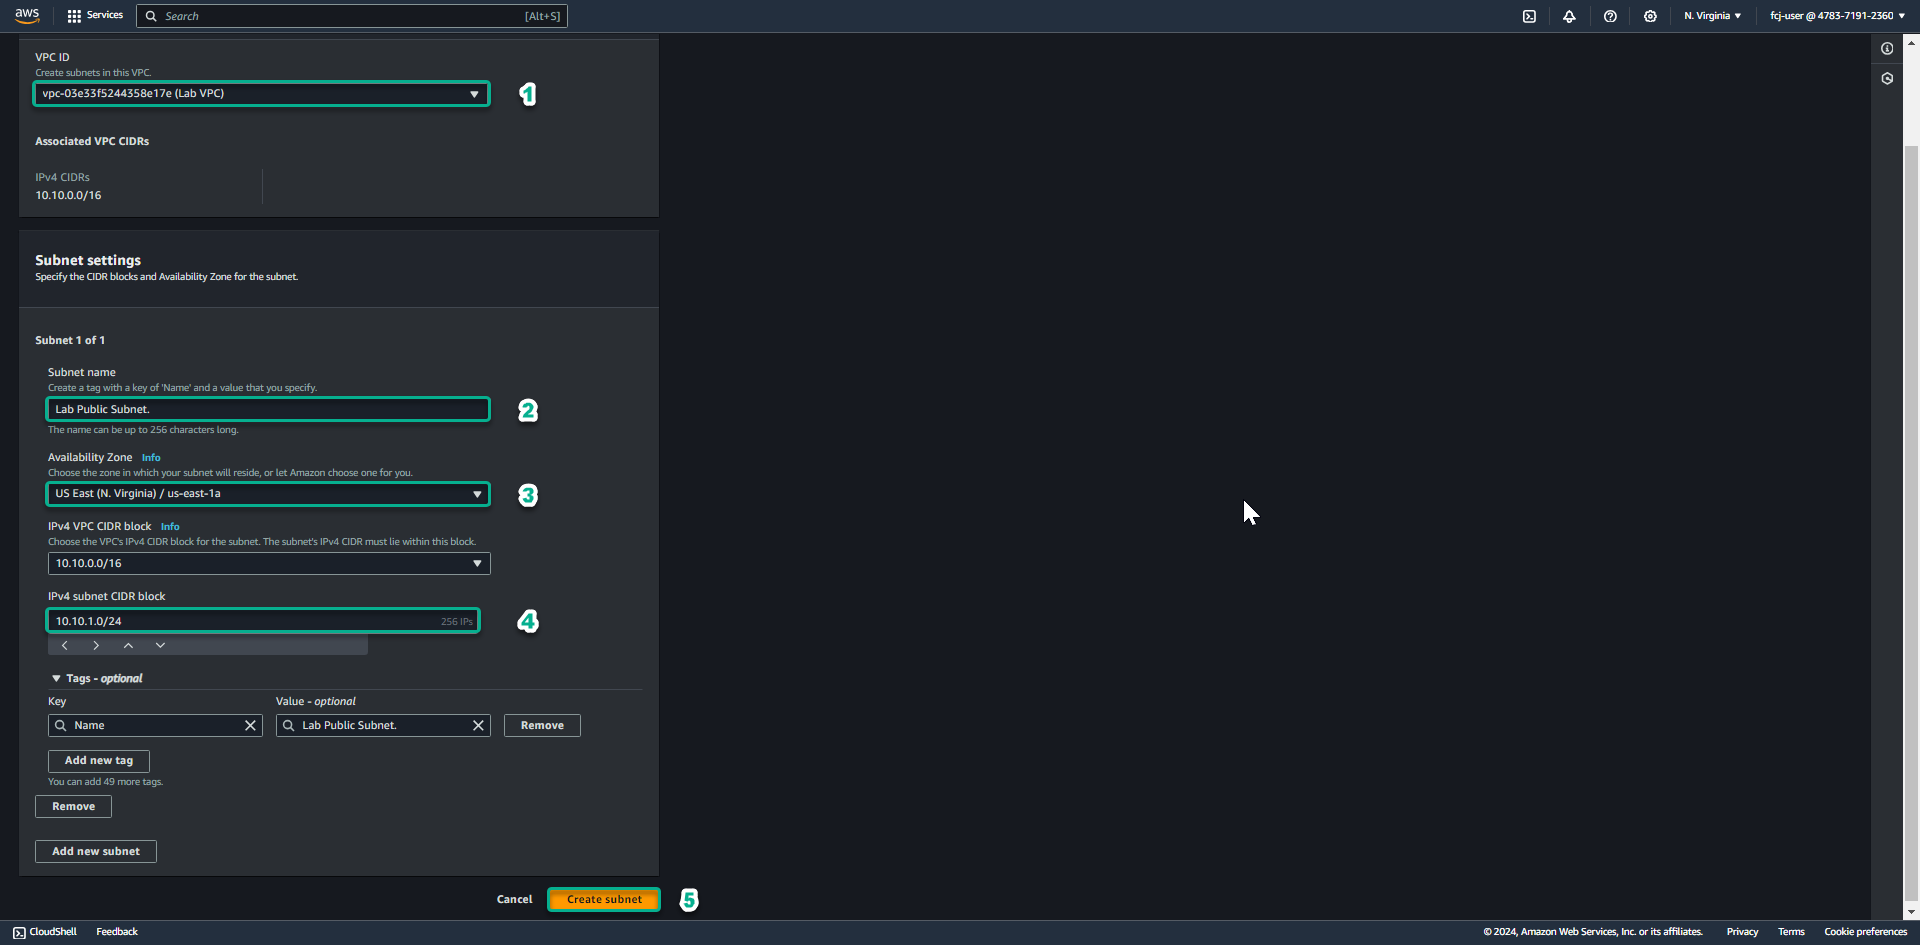
At the Create subnet page.
- In the VPC ID section, click Lab VPC.
- In the Subnet name field, enter Lab Public Subnet.
- In the Availability Zone section, select the first Availability zone.
- In the field IPv4 CIRD block enter 10.10.1.0/24.
-
Scroll to the bottom of the page, click Create subnet.
-
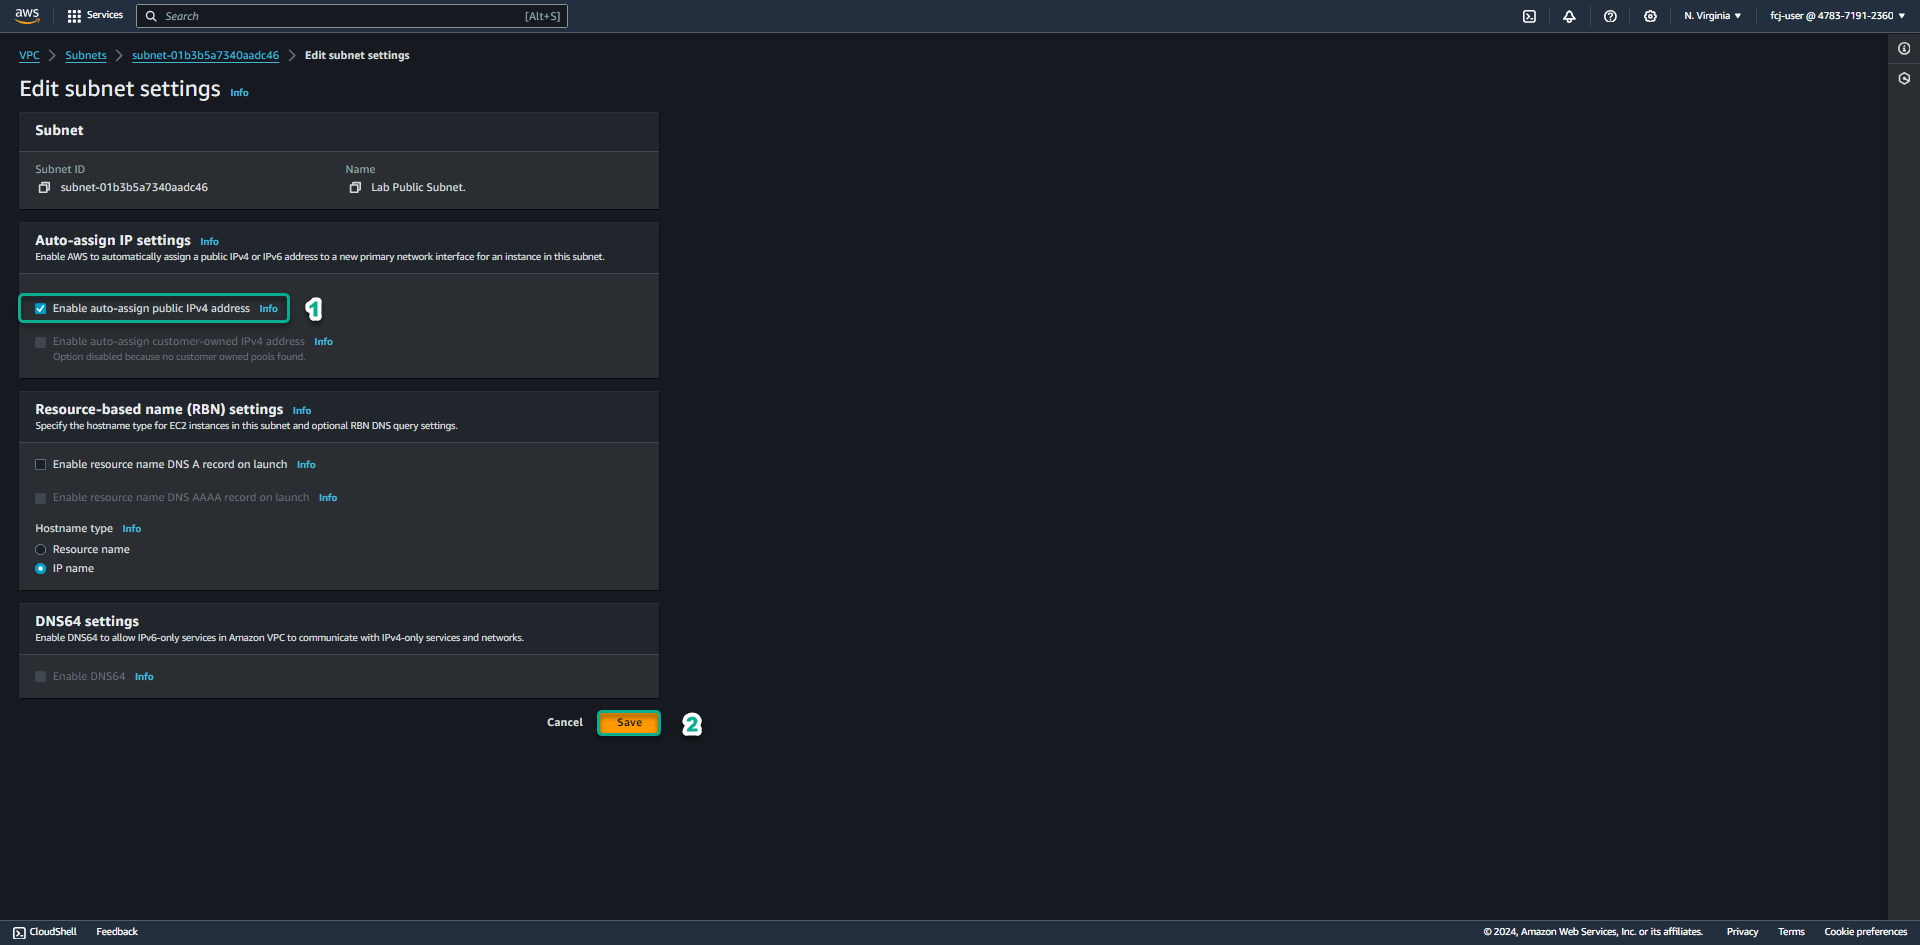
Click Lab Public Subnet.
- Click Actions.
- Click Edit subnet settings.

-
Click Enable auto-assign public IPv4 address.
-
Click Internet Gateways.
- Click Create internet gateway.
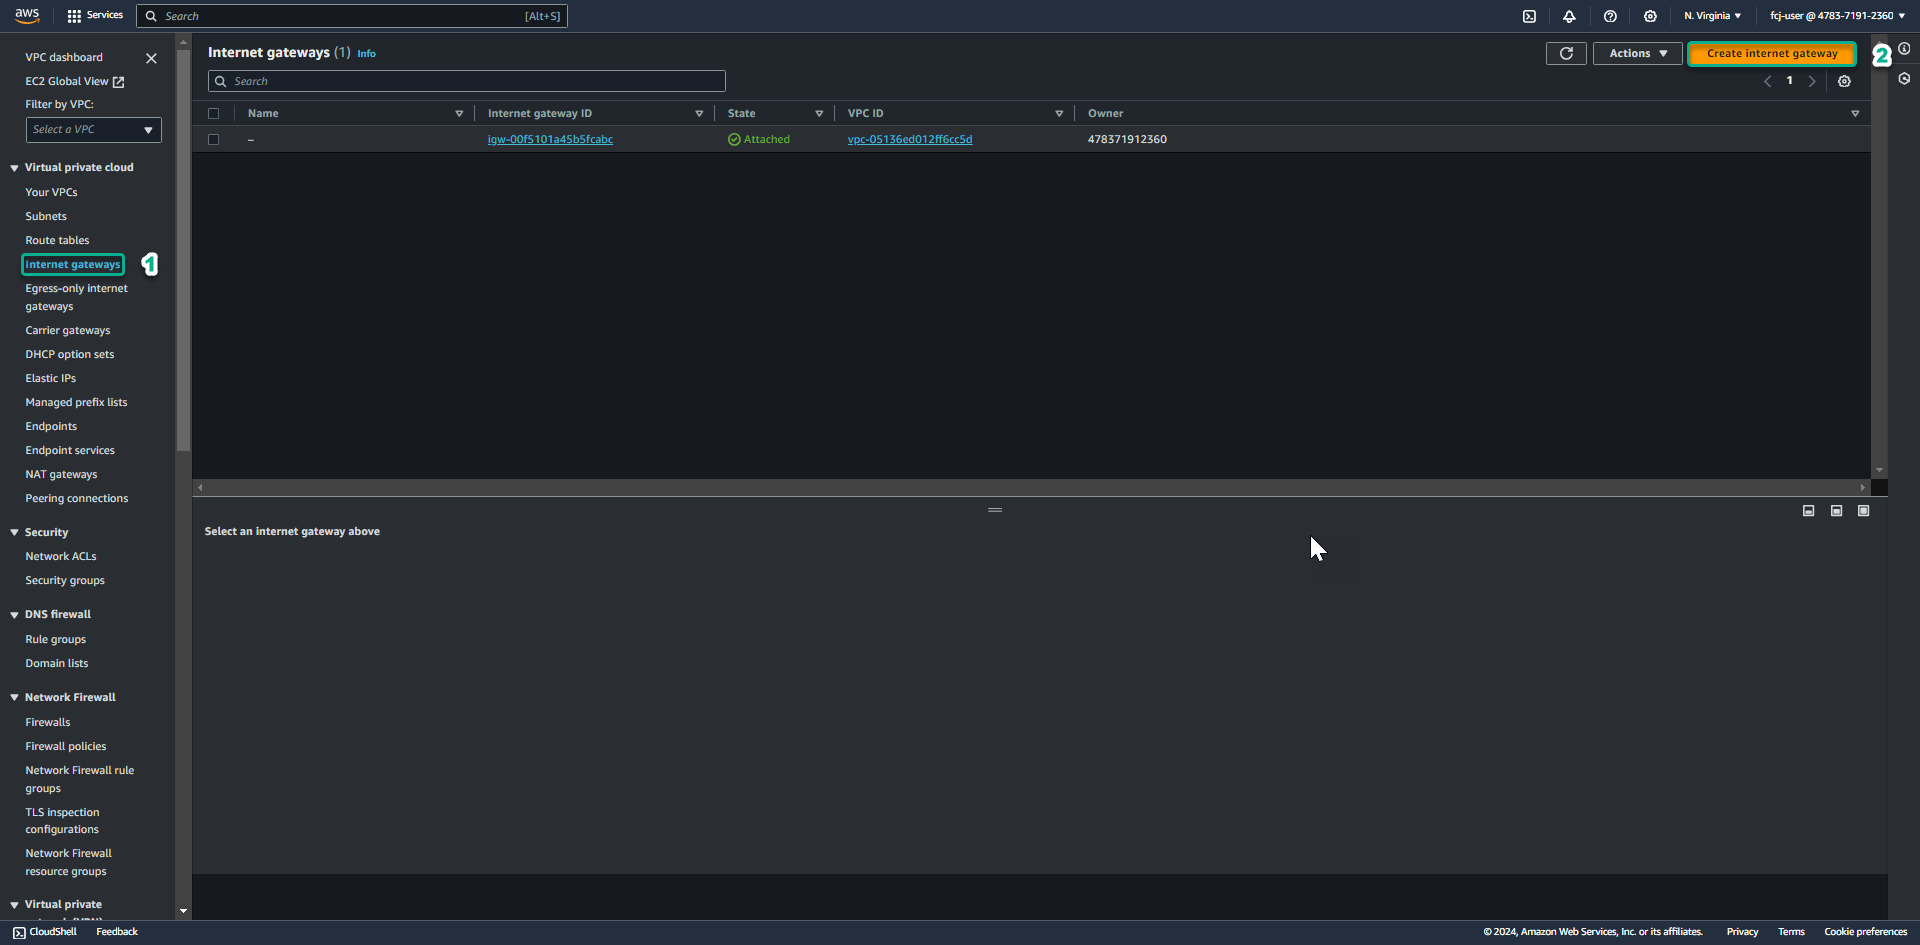
- Click Create internet gateway.
-
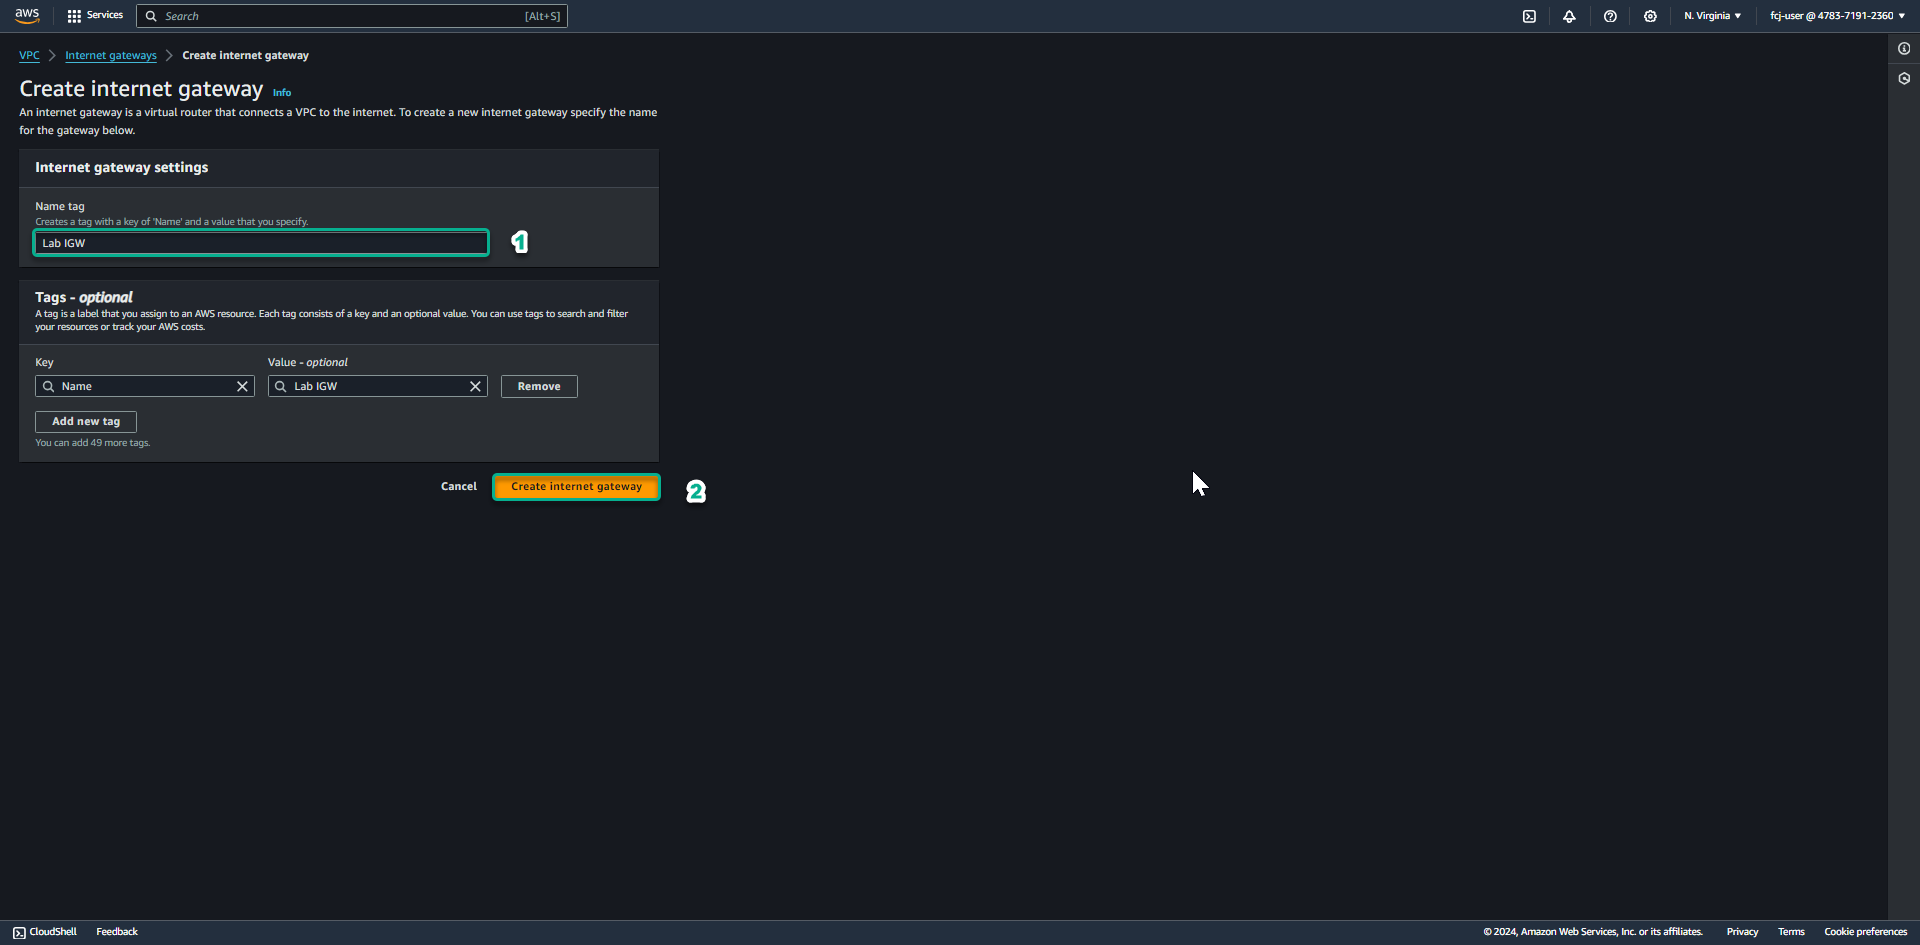
At the Create internet gateway page.
- In the Name tag field, enter Lab IGW.
- Click Create internet gateway.
-
After successful creation, click Actions.
- Click Attach to VPC.
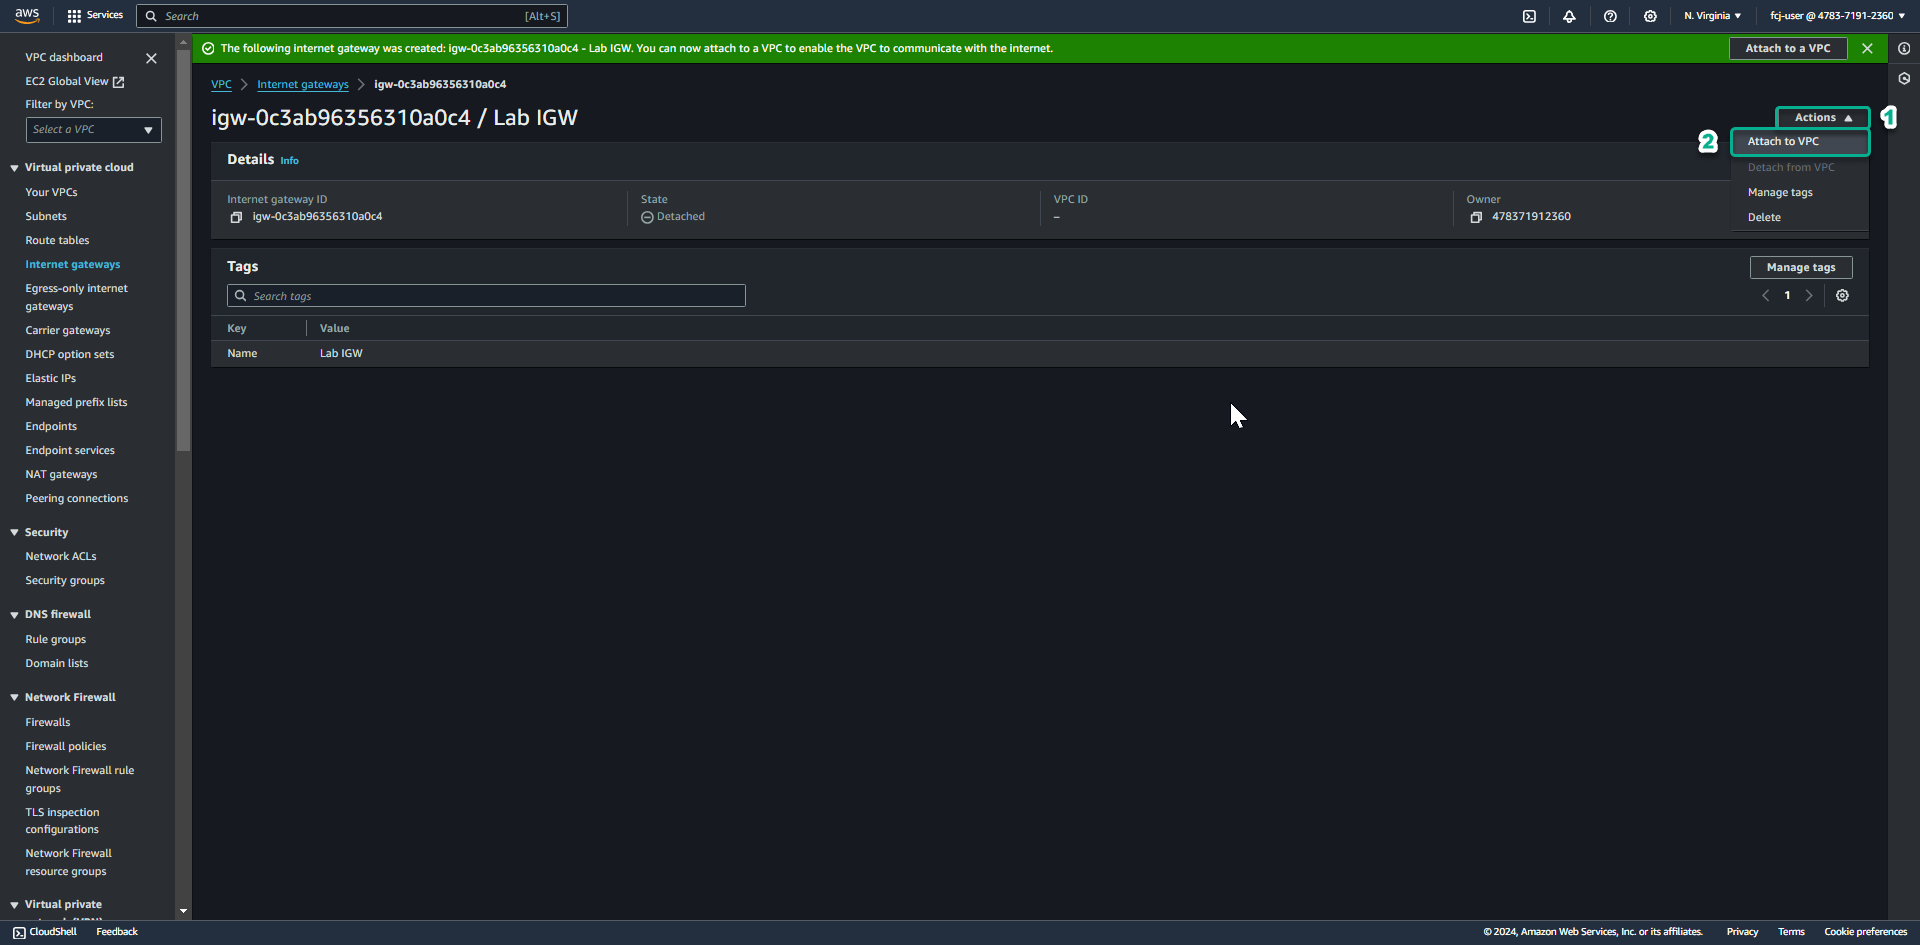
- Click Attach to VPC.
-
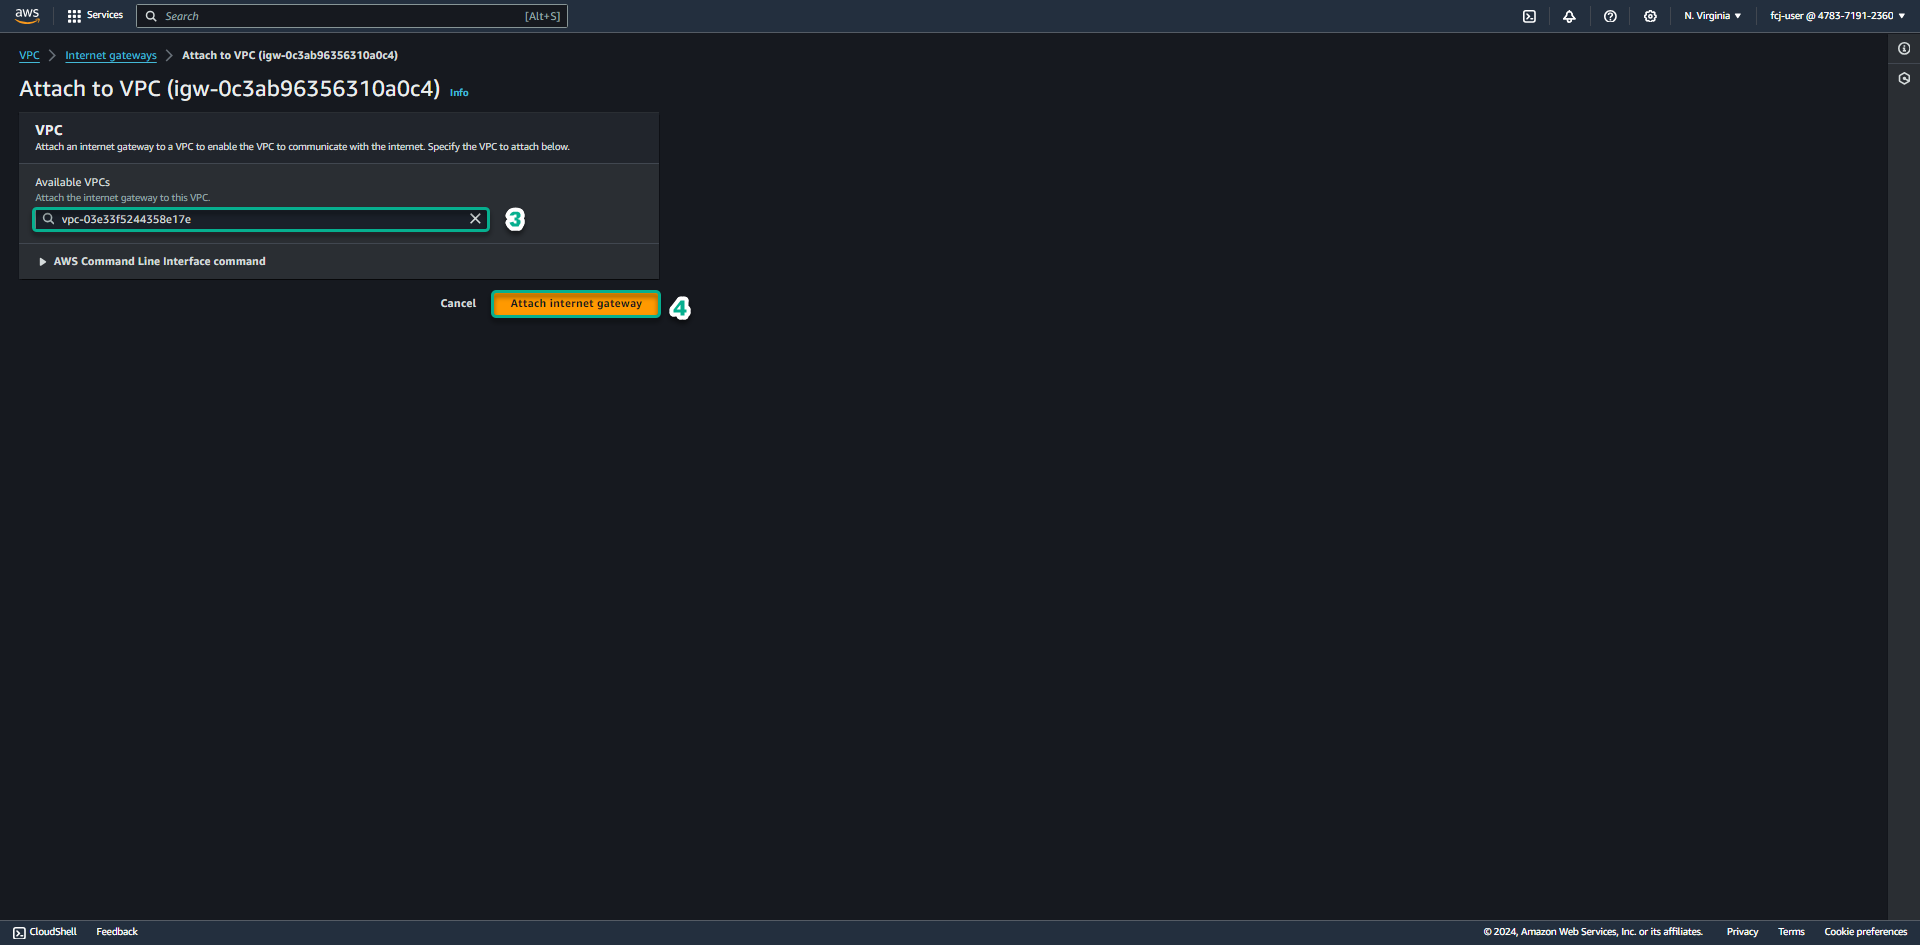
At the Attach to VPC page.
- In the Available VPCs section, select Lab VPC.
- Click Attach internet gateway.
- Check the successful attaching process as shown below.
-
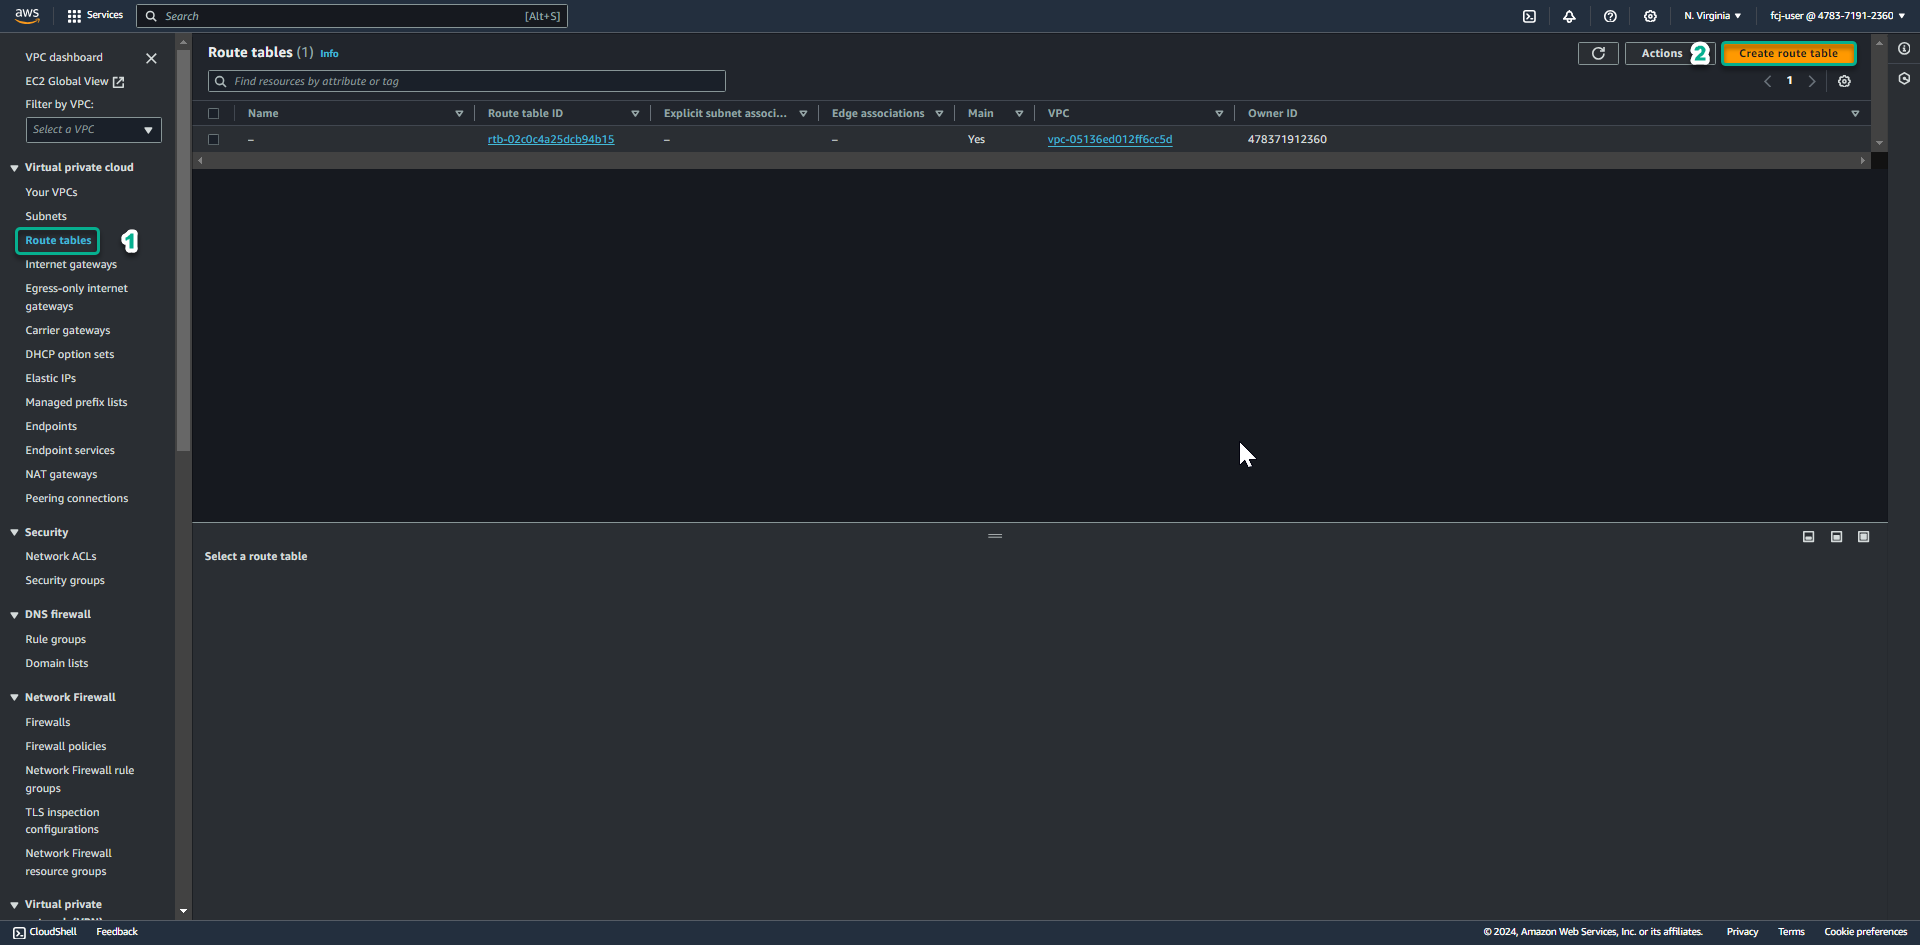
Next we will create a custom route table to assign to Lab Public Subnet.
- Click Route Tables.
- Click Create route table.
-
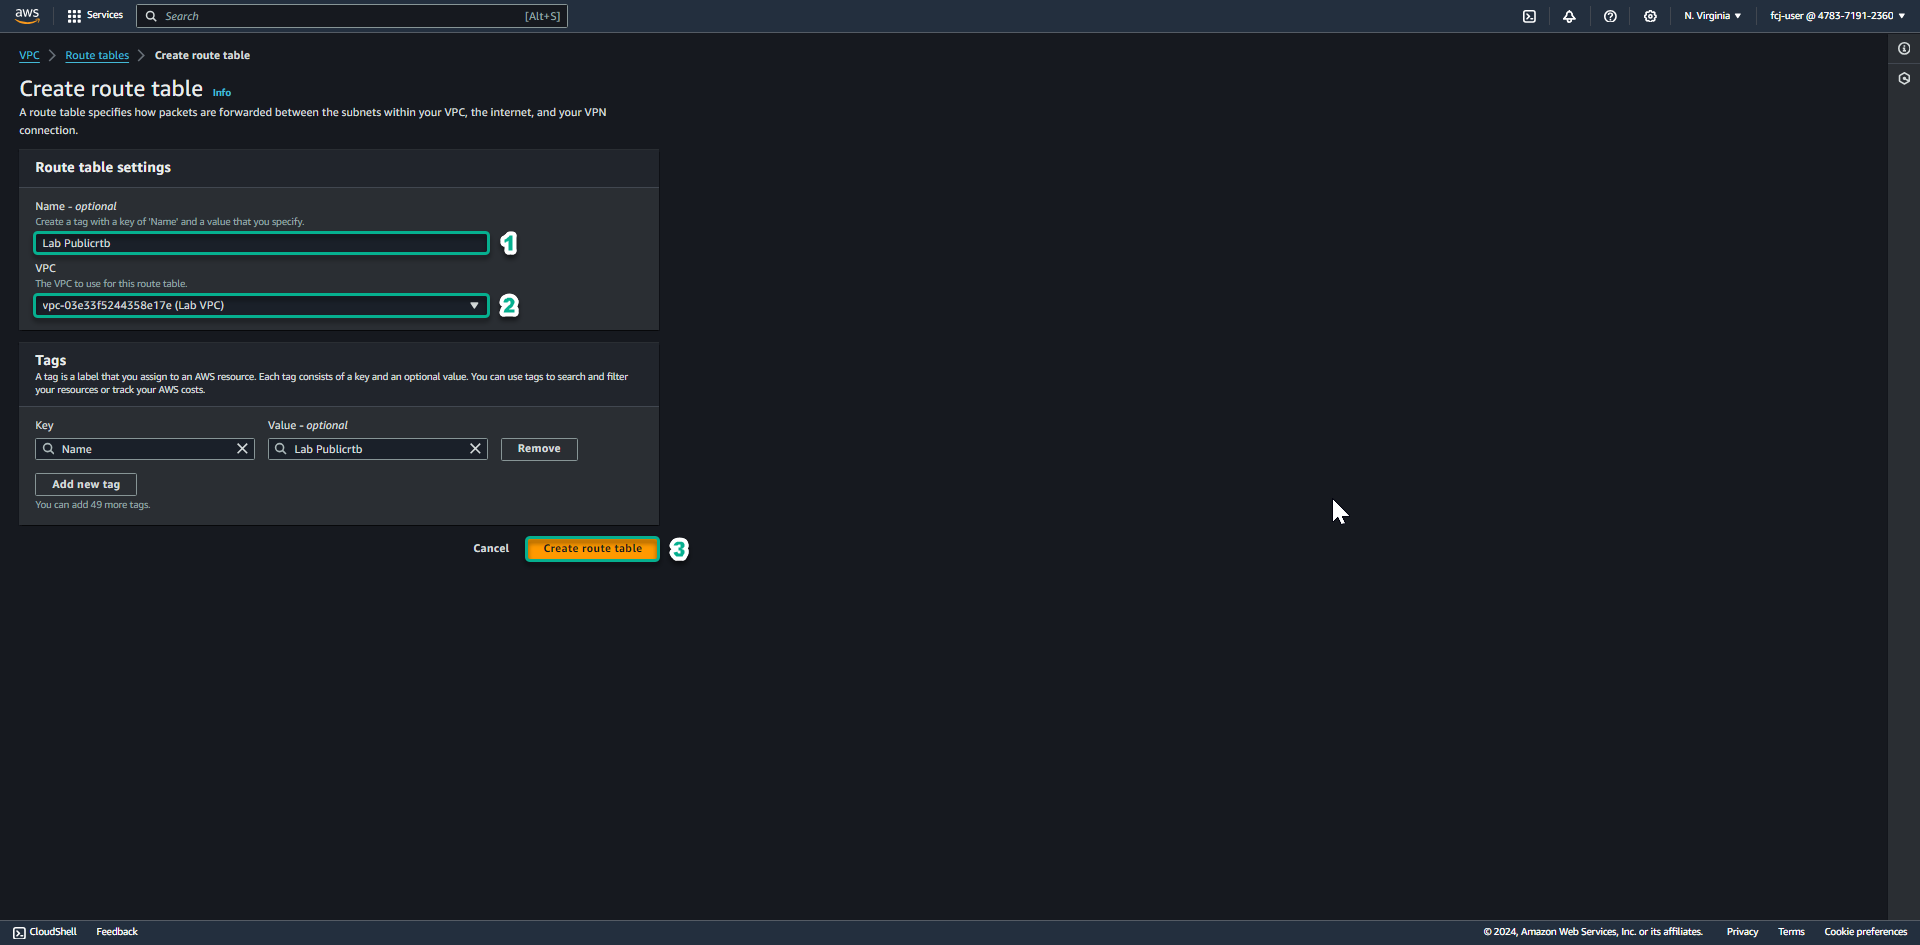
At the Create route table page.
- In the Name field, enter Lab Publicrtb.
- In the VPC section, select Lab VPC.
- Click Create route table.
-
After creating the route table successfully.
- Click Edit routes.
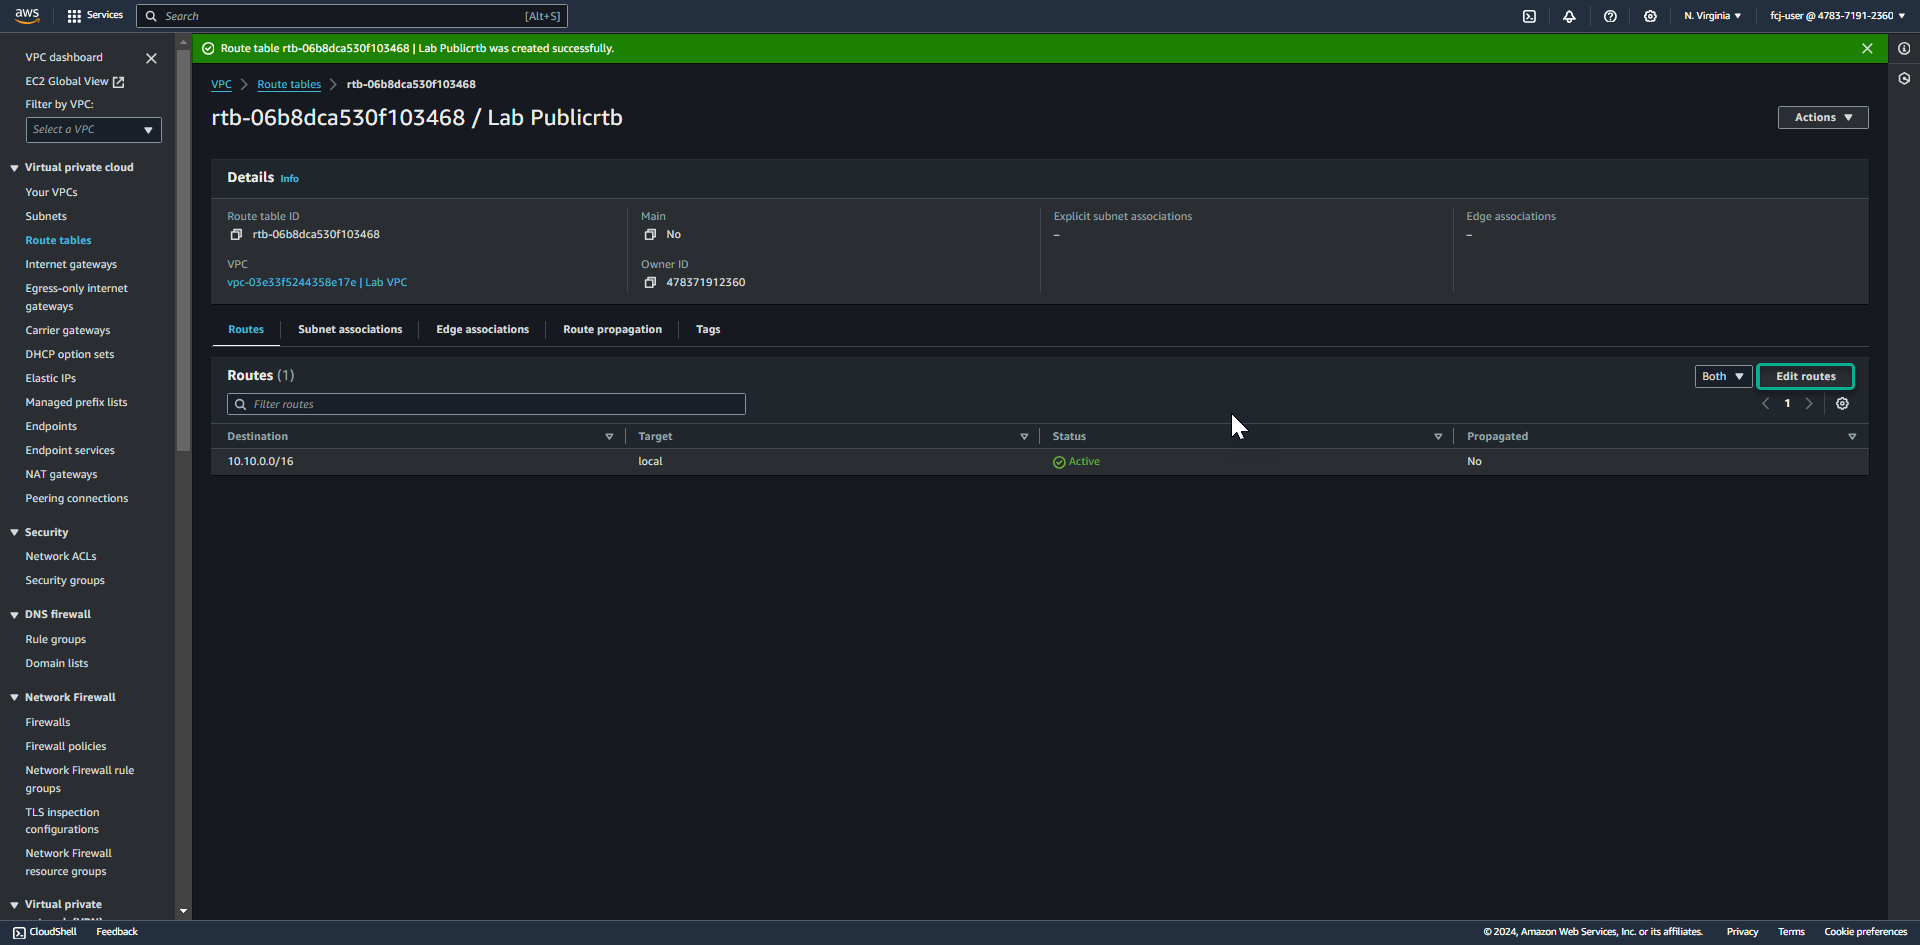
- Click Edit routes.
-
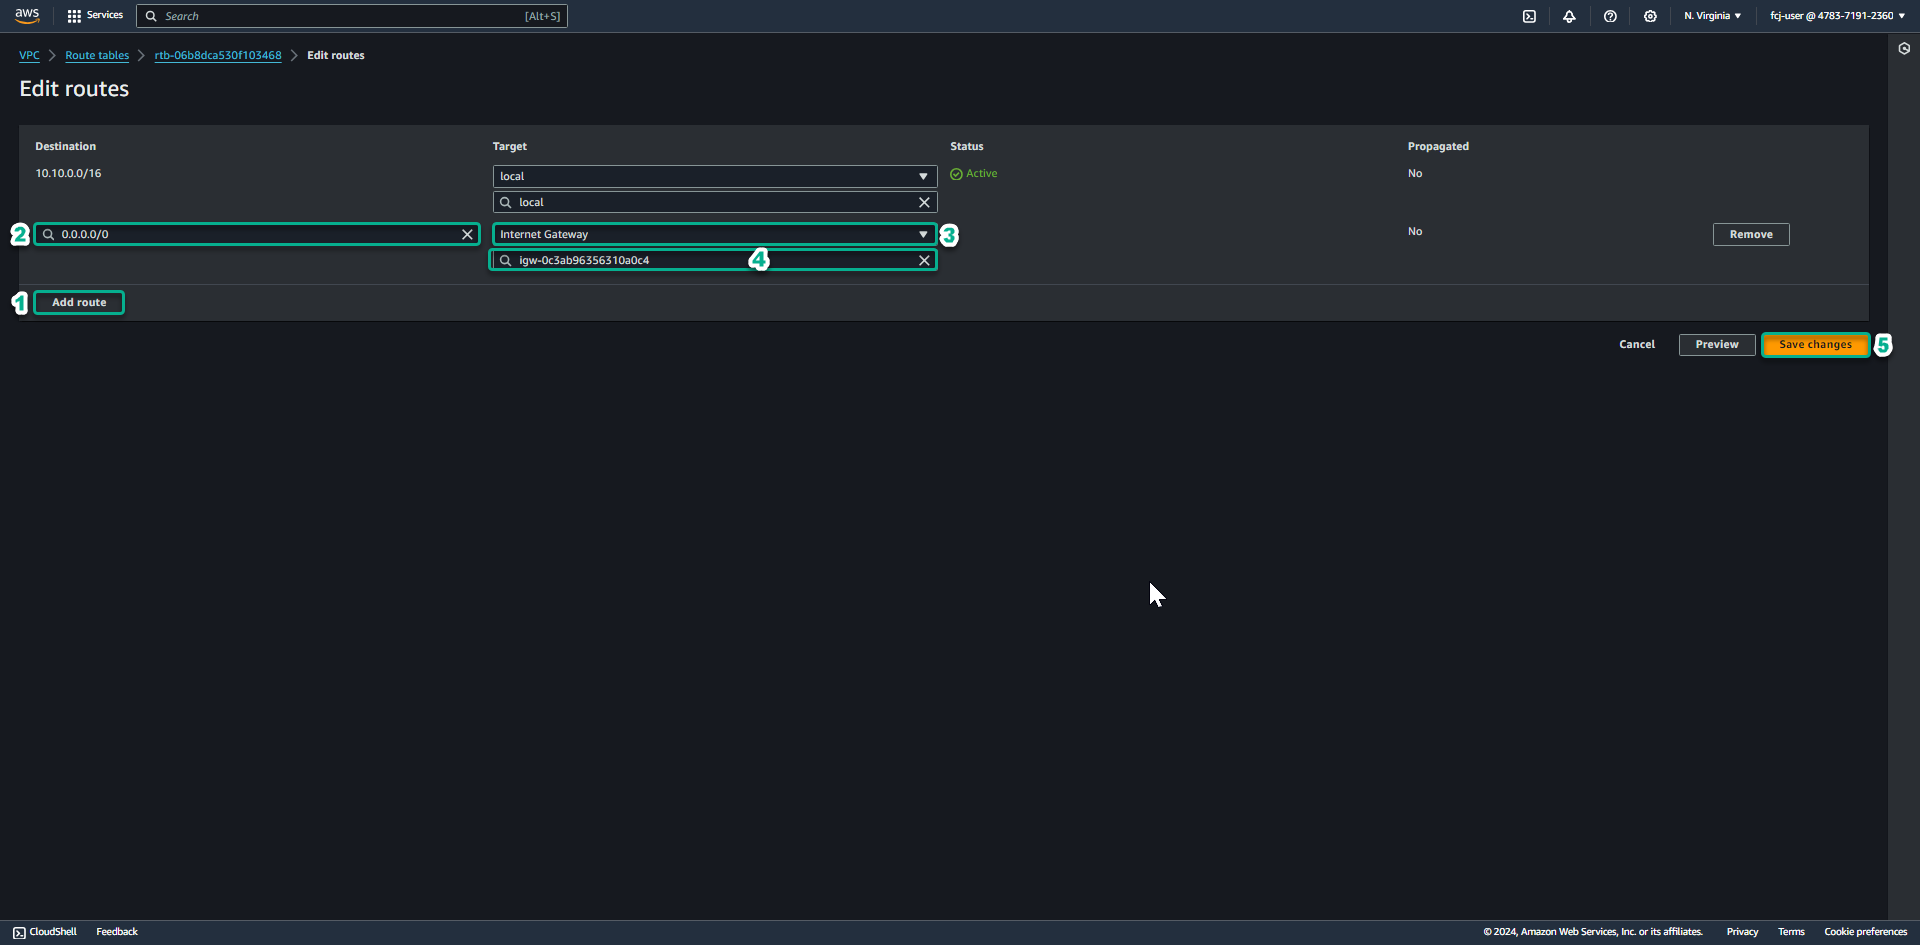
At the Edit routes page.
- Click Add route.
- In the Destination field, enter 0.0.0.0/0
- In the Target section, select Internet Gateway and then select Lab IGW.
- Click Save changes.
-
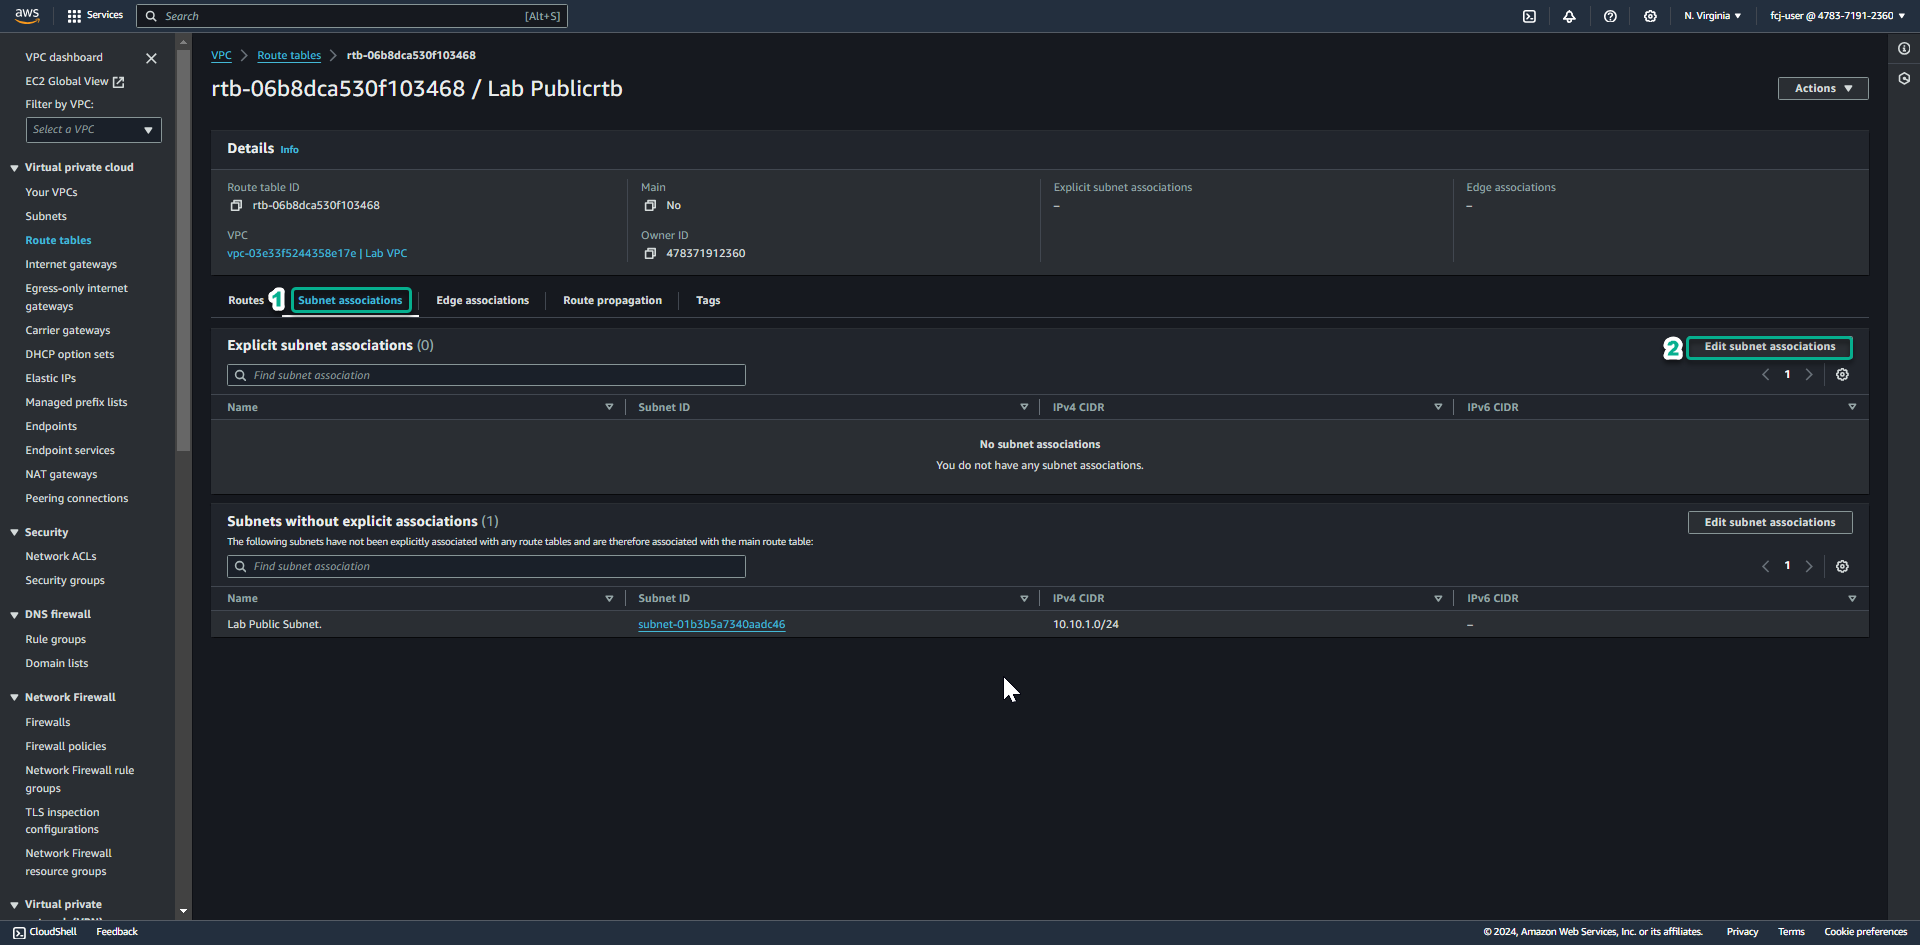
Click the Subnet associations tab.
- Click Edit subnet associations to proceed with the associate custom route table we just created in Lab Public Subnet.
- Click Edit subnet associations to proceed with the associate custom route table we just created in Lab Public Subnet.
-
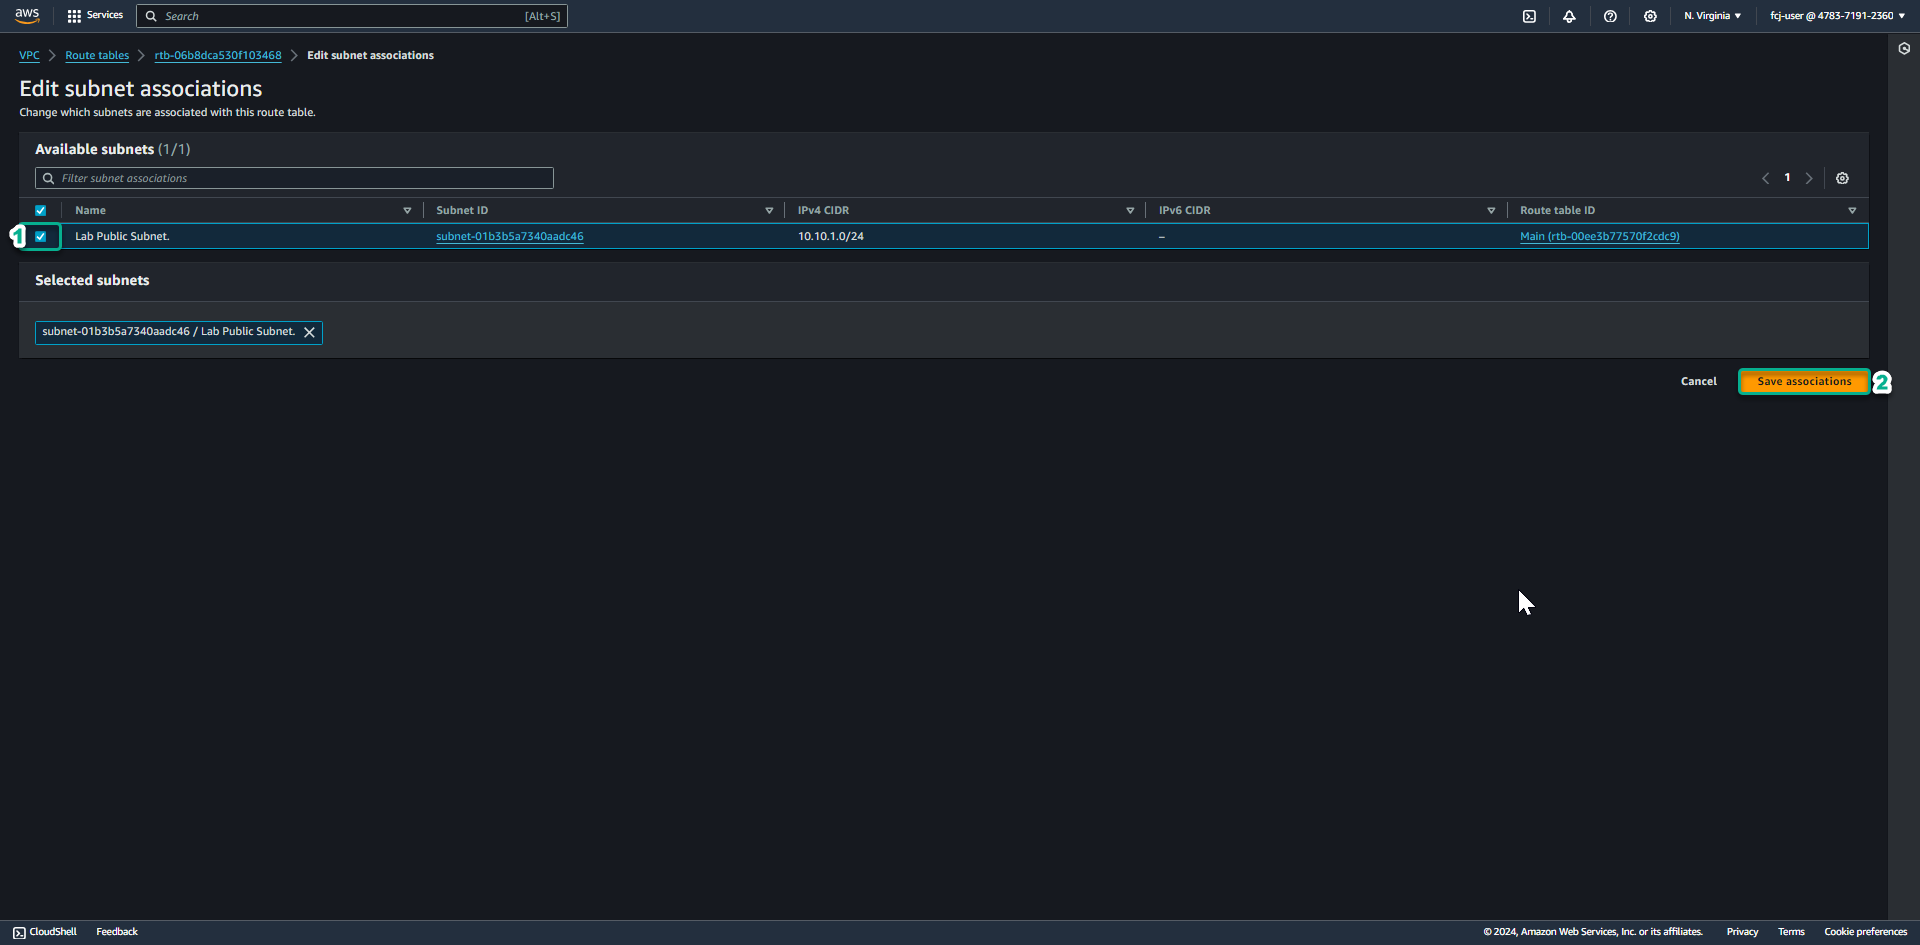
At the Edit subnet associations page.
- Click on Lab Public Subnet.
- Click Save associations.
-
Check that the route table information has been associated with Lab Public Subnet and the internet route information has been pointed to the Internet Gateway as shown below.
