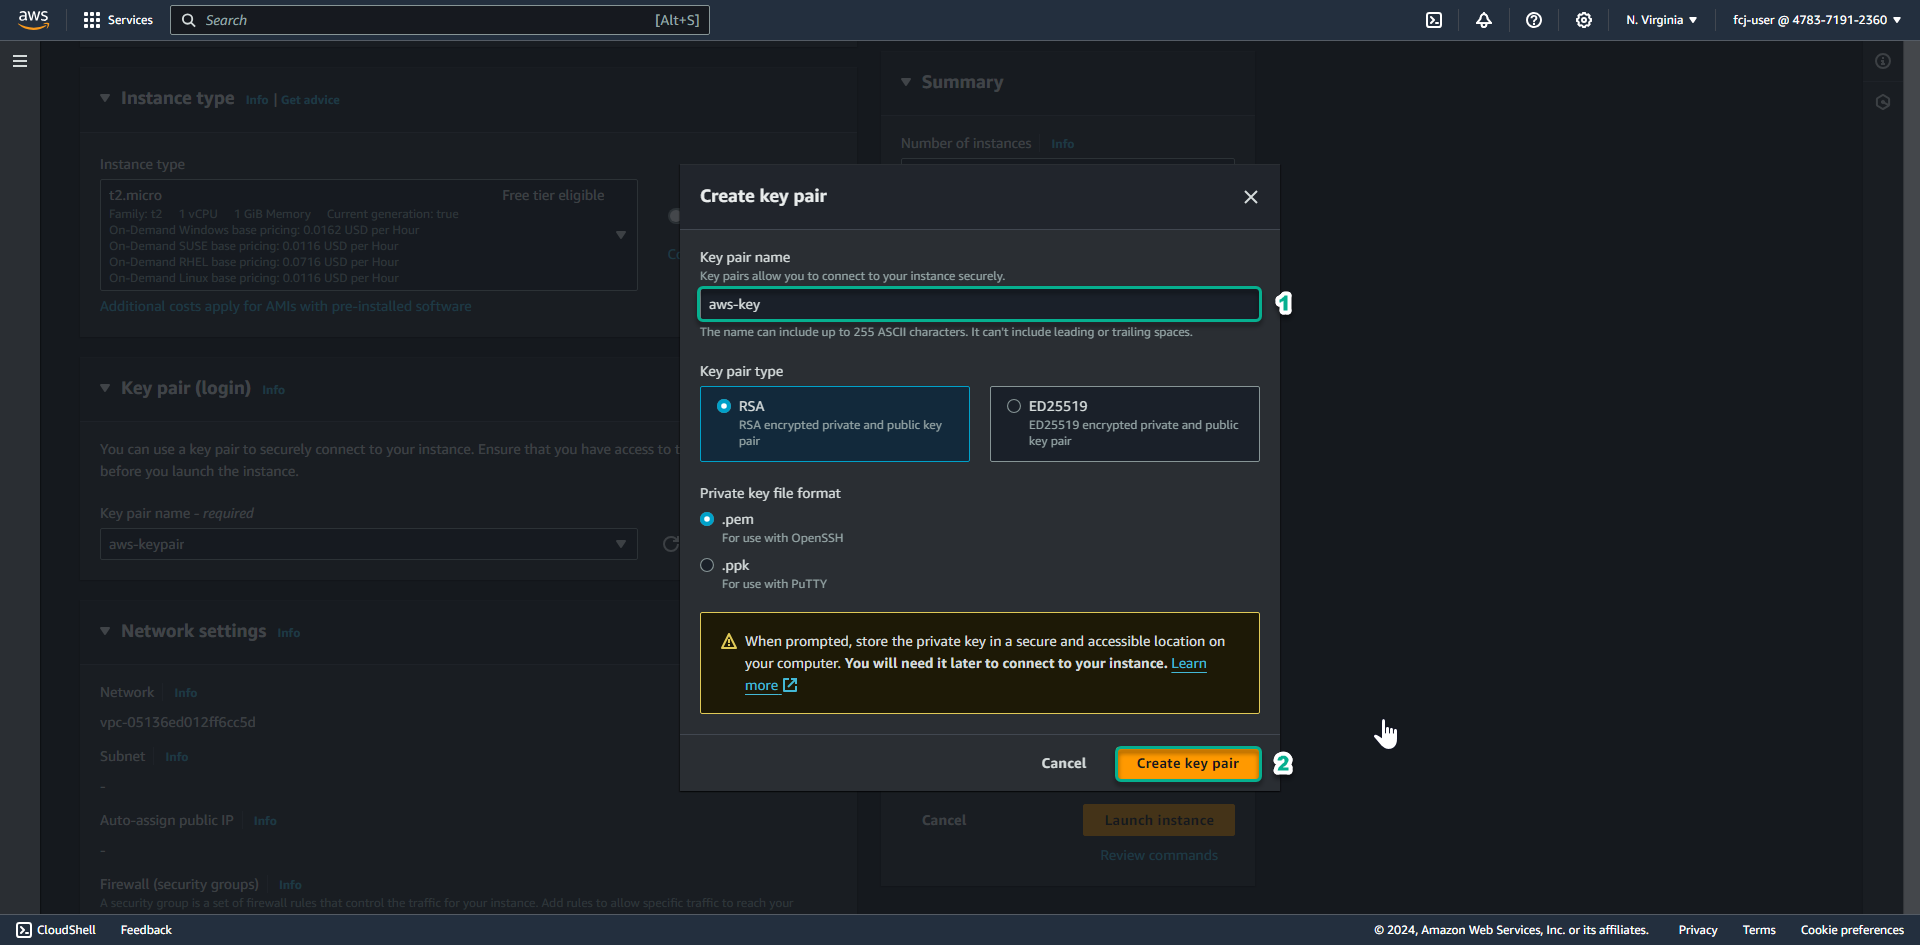
Create Public Linux EC2
Create Public EC2 Linux
You can refer to how to create EC2 Linux
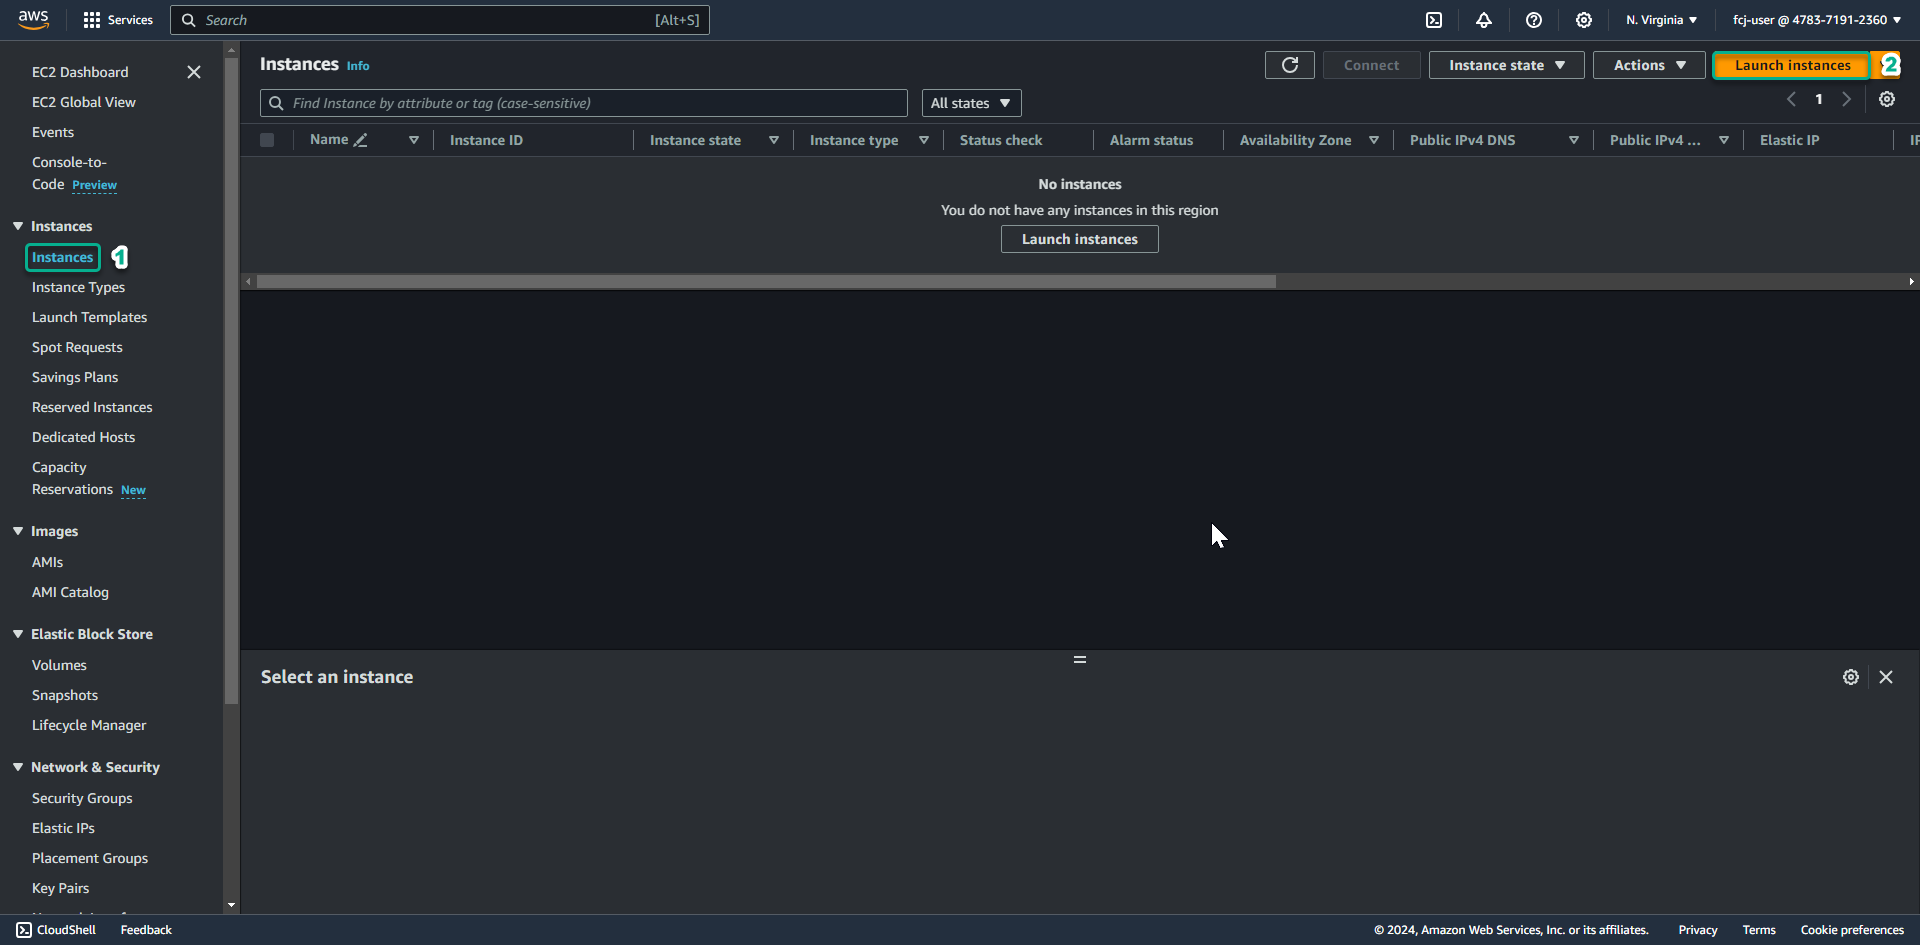
Access the EC2 service management console
- Click Instances.
- Click Launch instances.
In the Name and tags section
- Name the instance:
Public Linux Instance
- Name the instance:
In the Amazon Machine Image (AMI) section.
- Click Select to choose the AMI Amazon Linux 2023 AMI.
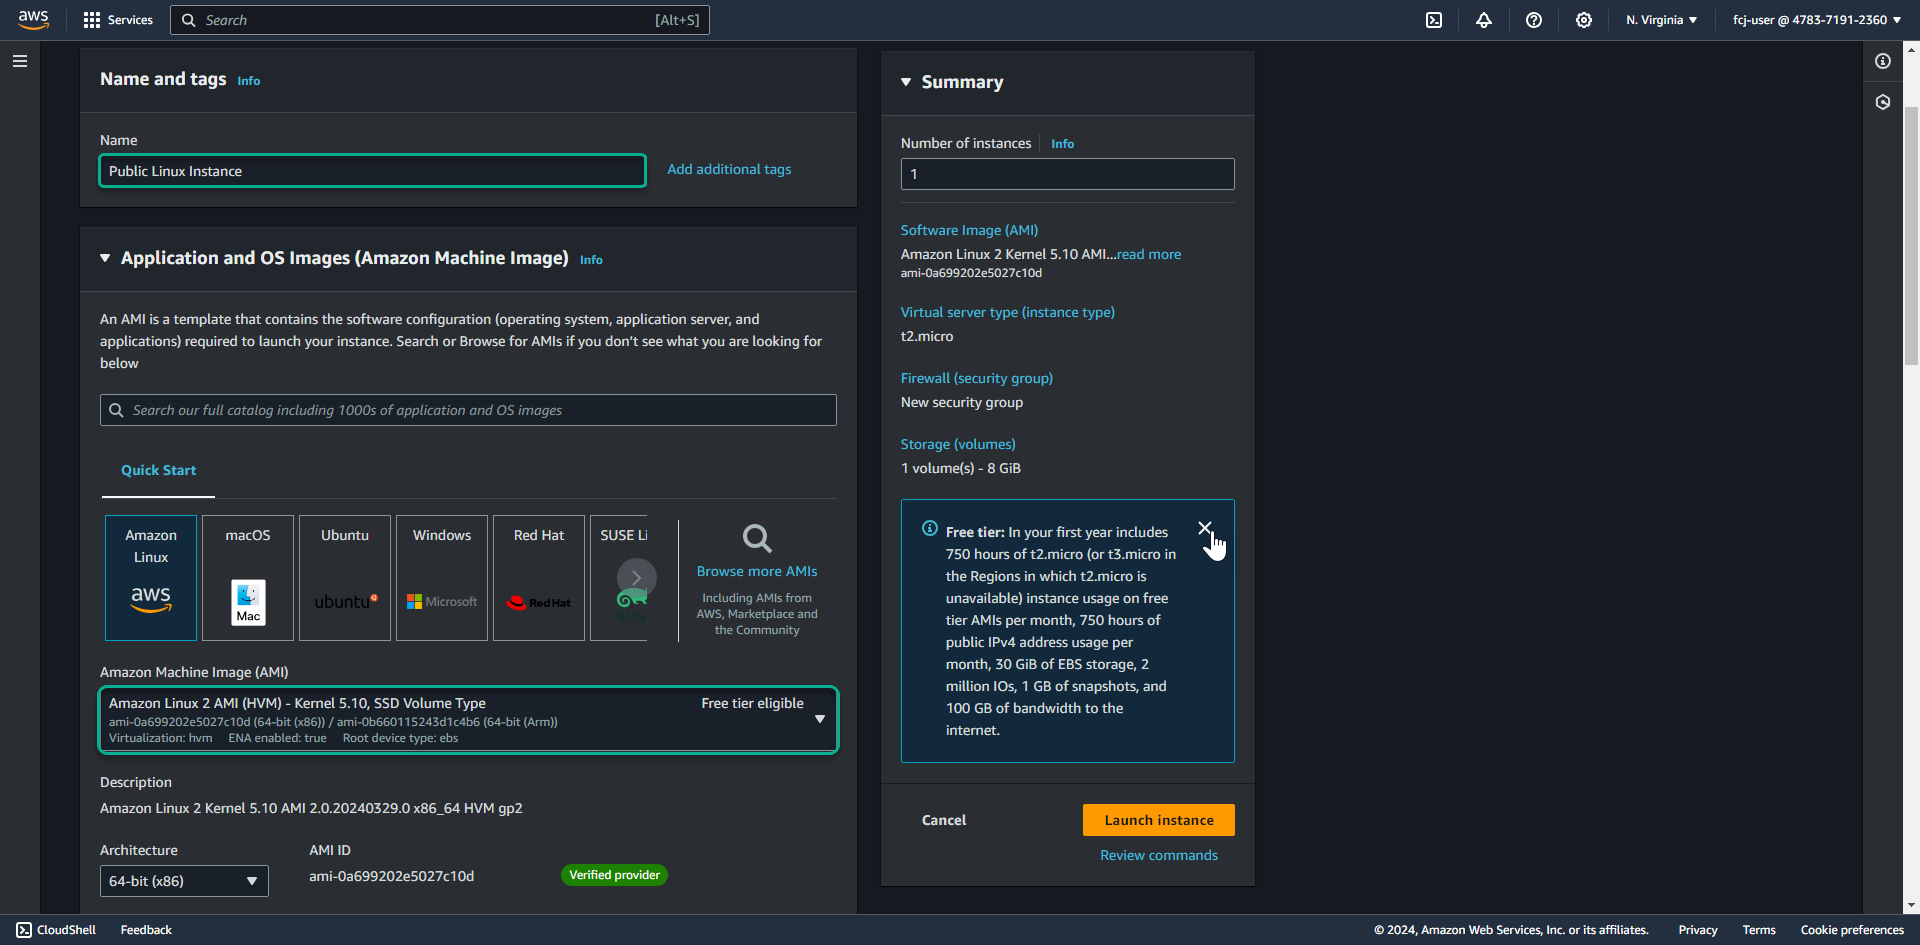
- Click Select to choose the AMI Amazon Linux 2023 AMI.
In the Instance Type section.
- Click select Instance type t3.micro.
In the Key Pair (login) section.
- Click select the key pair you created earlier.
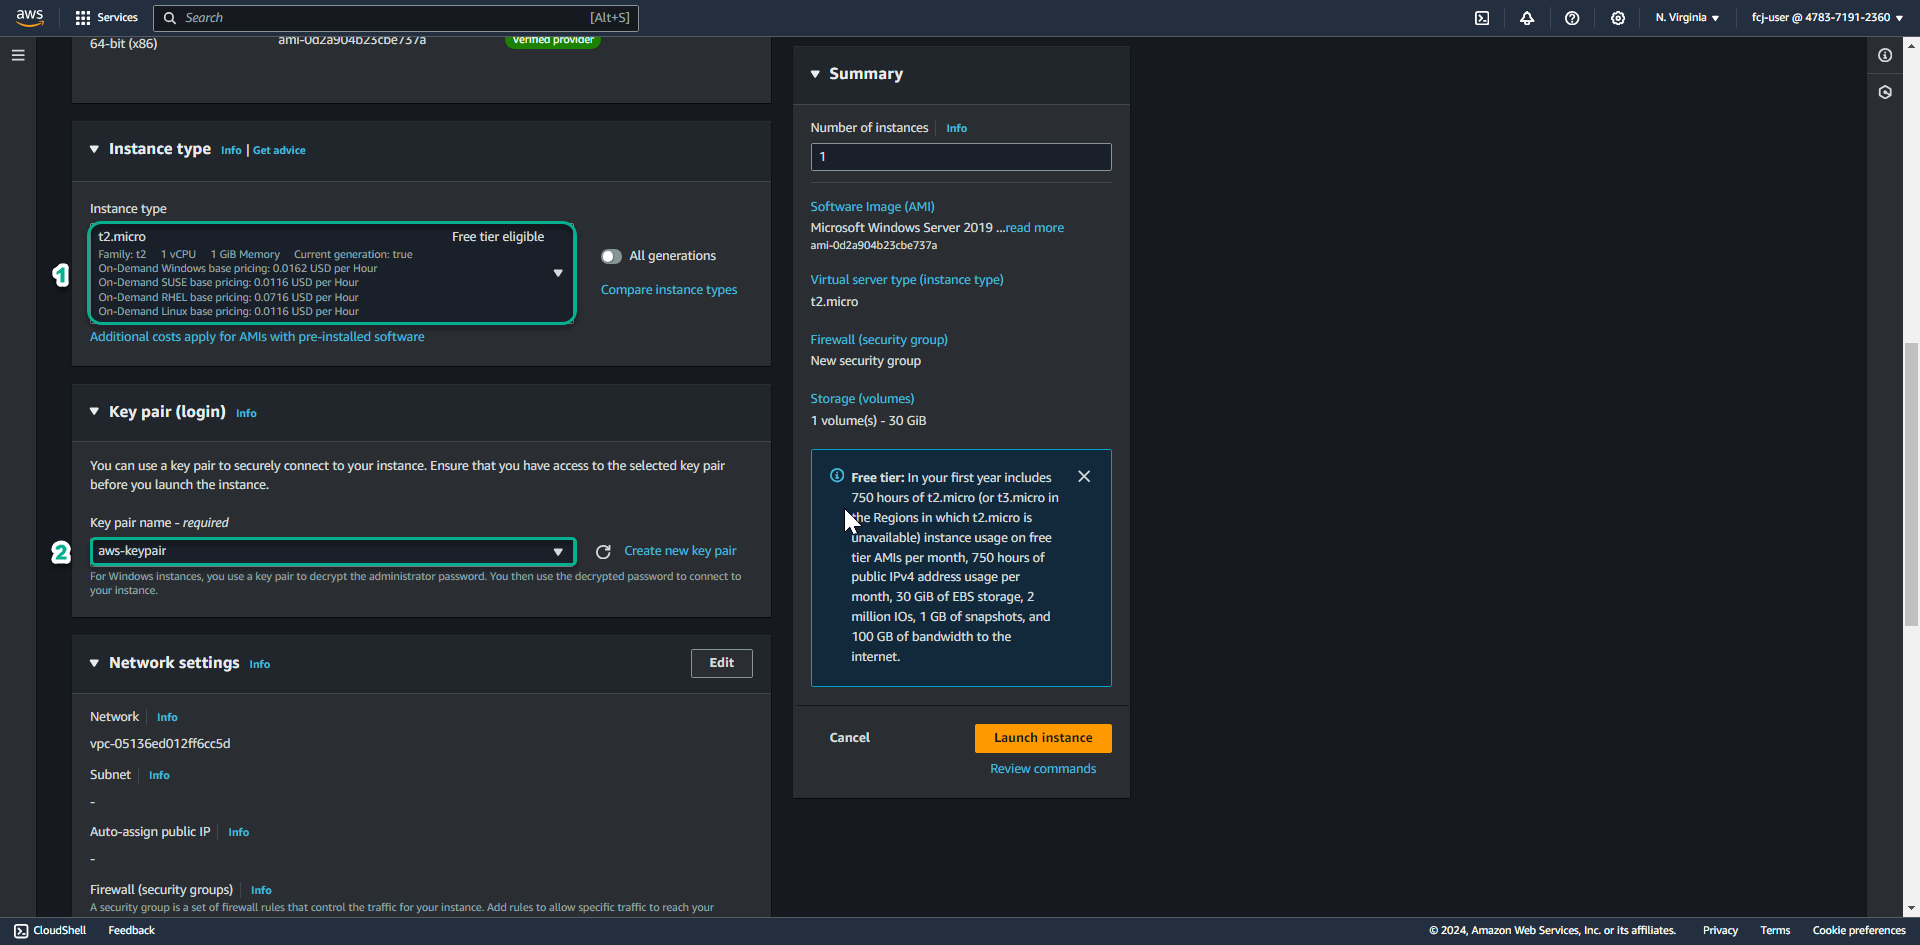
- Click select the key pair you created earlier.
In the Network setting section
- In the Network section, press Edit and select Lab VPC.
- In the Subnet section, select Lab Public Subnet.
- In the Auto-assign Public IP section, select Use subnet setting (Enable)
- In the Firewall (security group) section, select select existing security group
- In the Common security group section, select SG Public Linux Instance
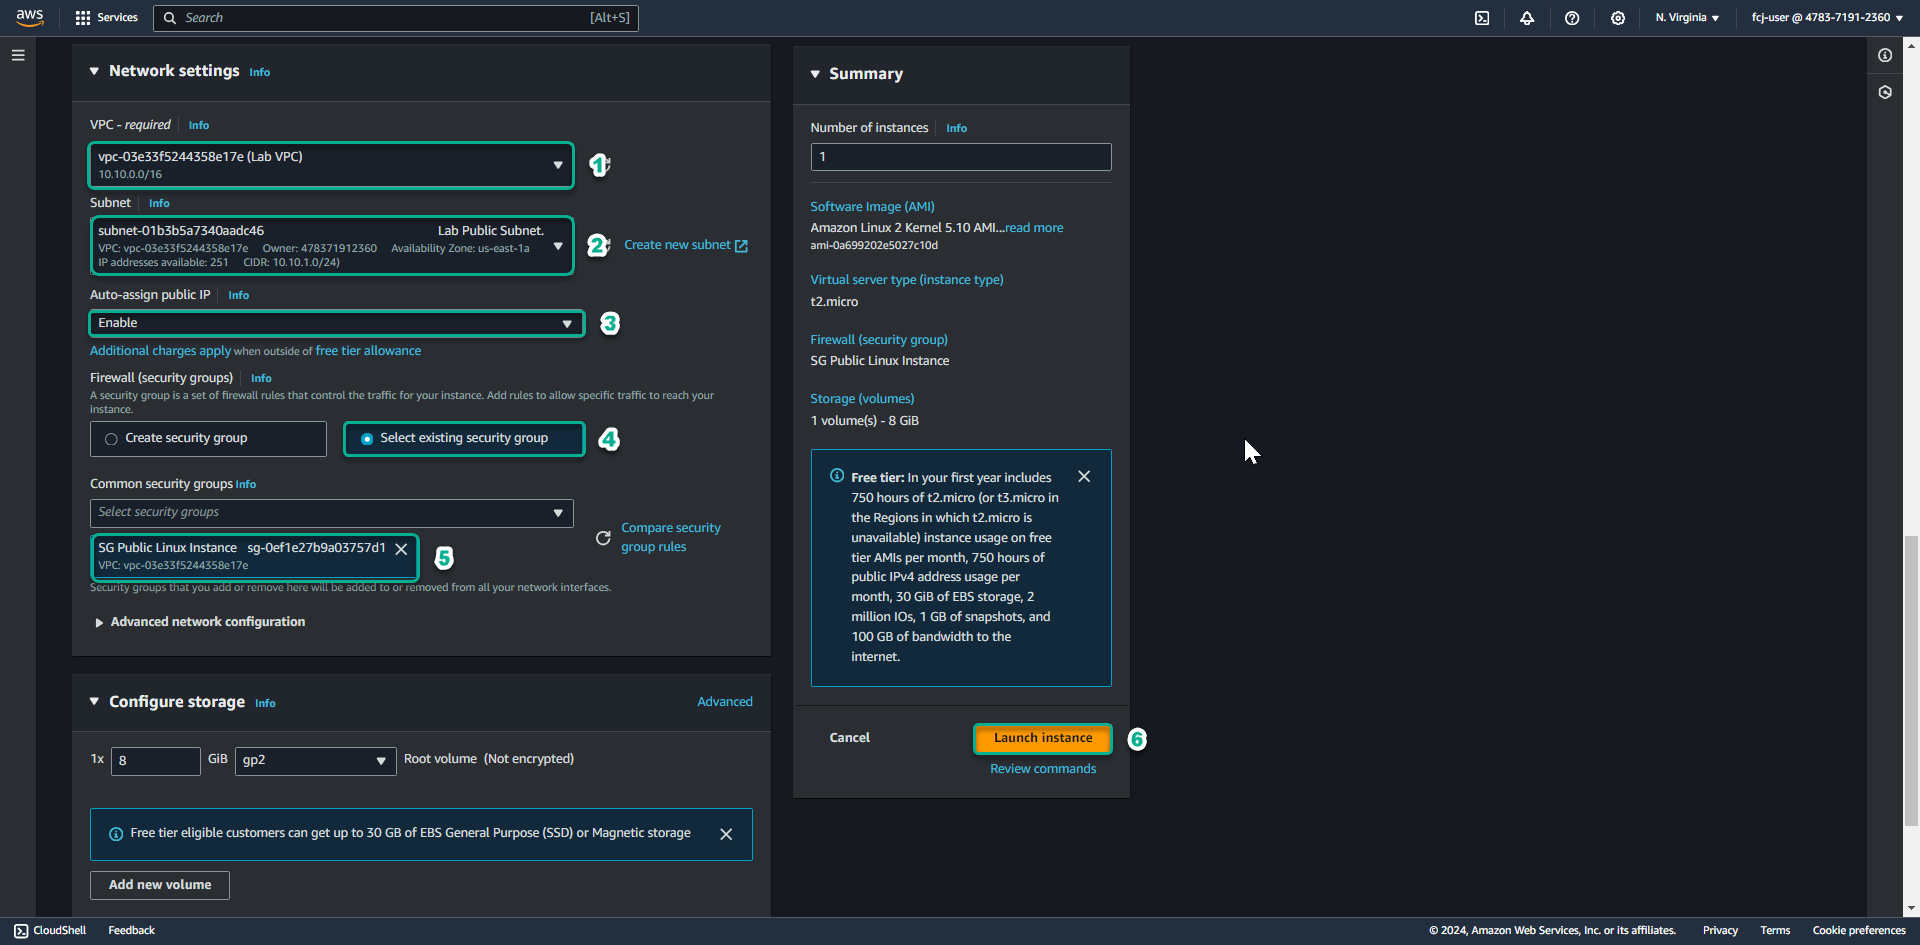
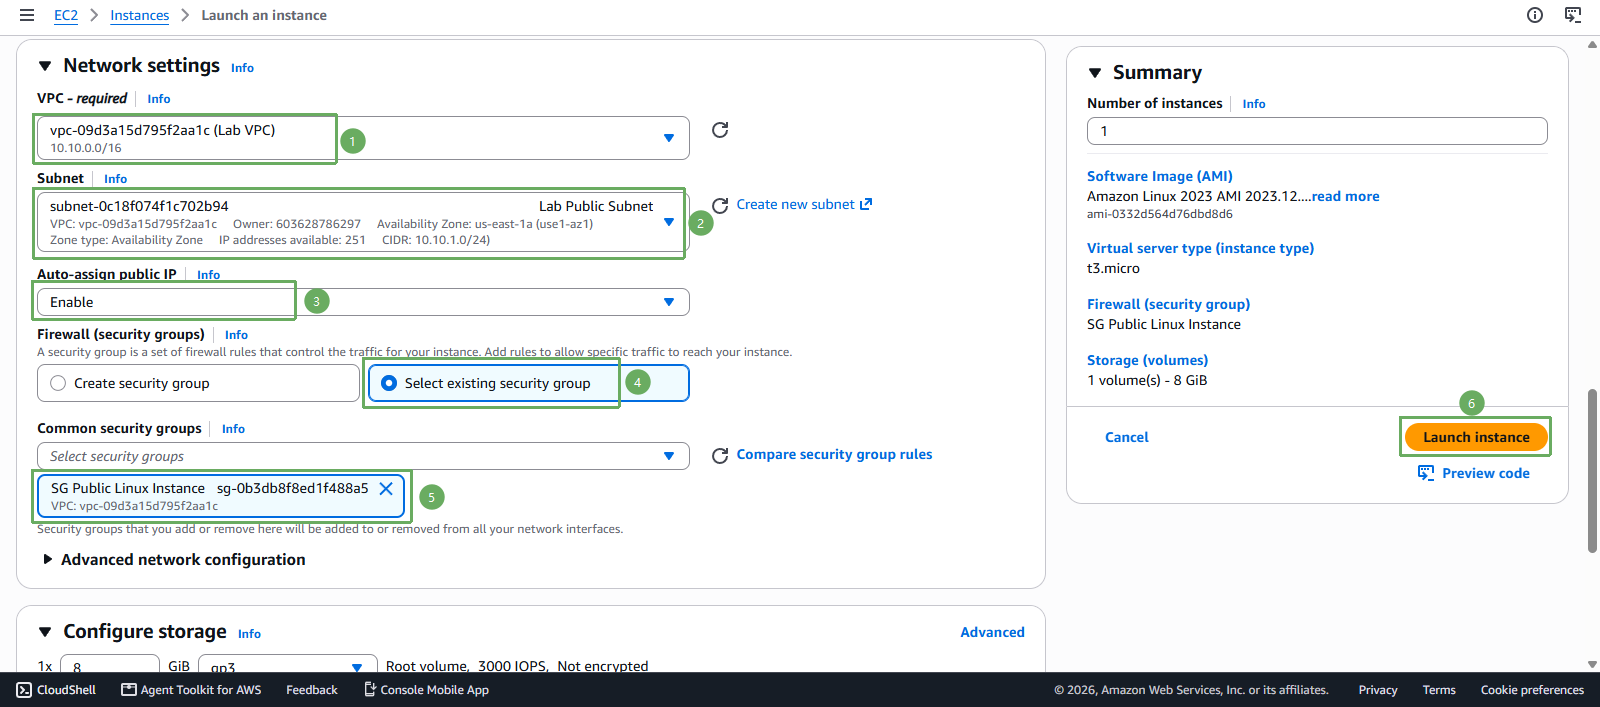
- In the Common security group section, select SG Public Linux Instance
Click Launch.
Click View Instances to return to the EC2 instances catalog. Next we will do similarly to create 1 Windows EC2 Instance running in the Private subnet.