Port Forwarding
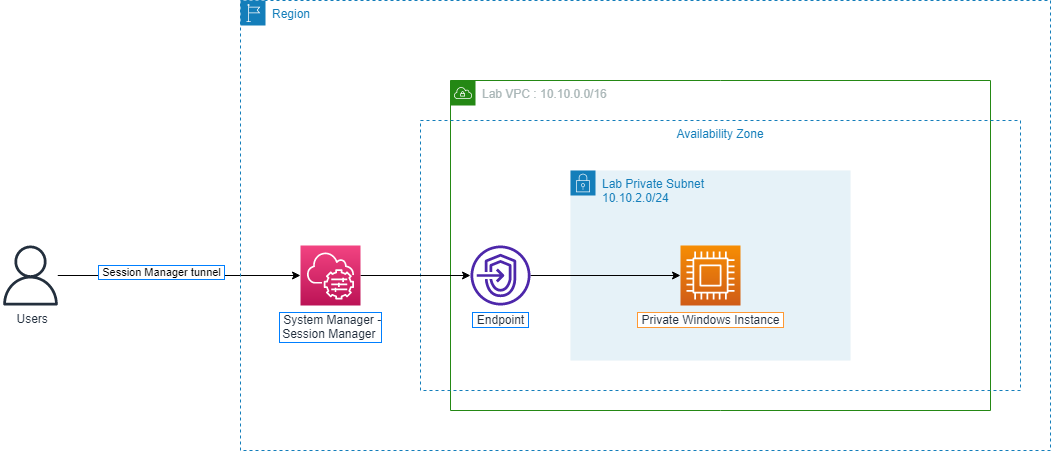
Port Forwarding is a useful method to redirect network traffic from one IP - Port to another IP - Port. With Port Forwarding, we can access an EC2 instance in a private subnet from our workstation.
We will configure Port Forwarding for the RDP connection between our machine and the Private Windows Instance in the private subnet that we created for this lab.
Create an IAM User with permissions to connect to SSM
Access the IAM service management console
- Click IAM users, then click Add users.
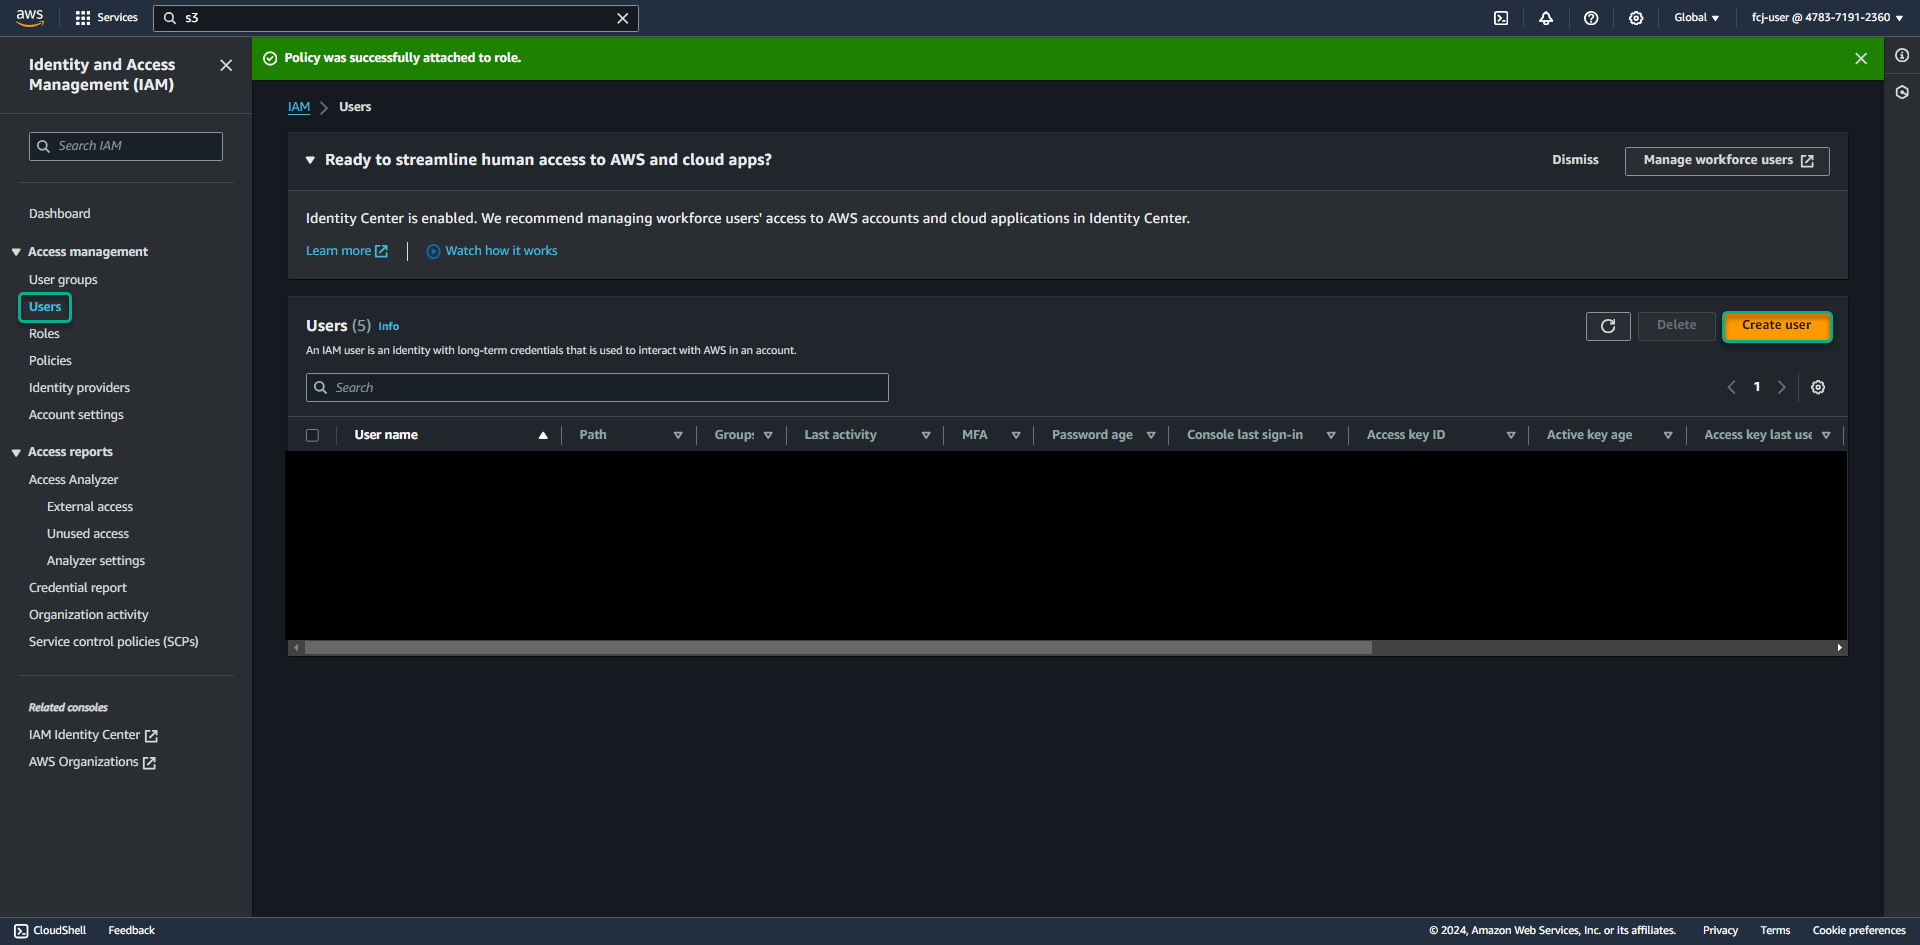
- Click IAM users, then click Add users.
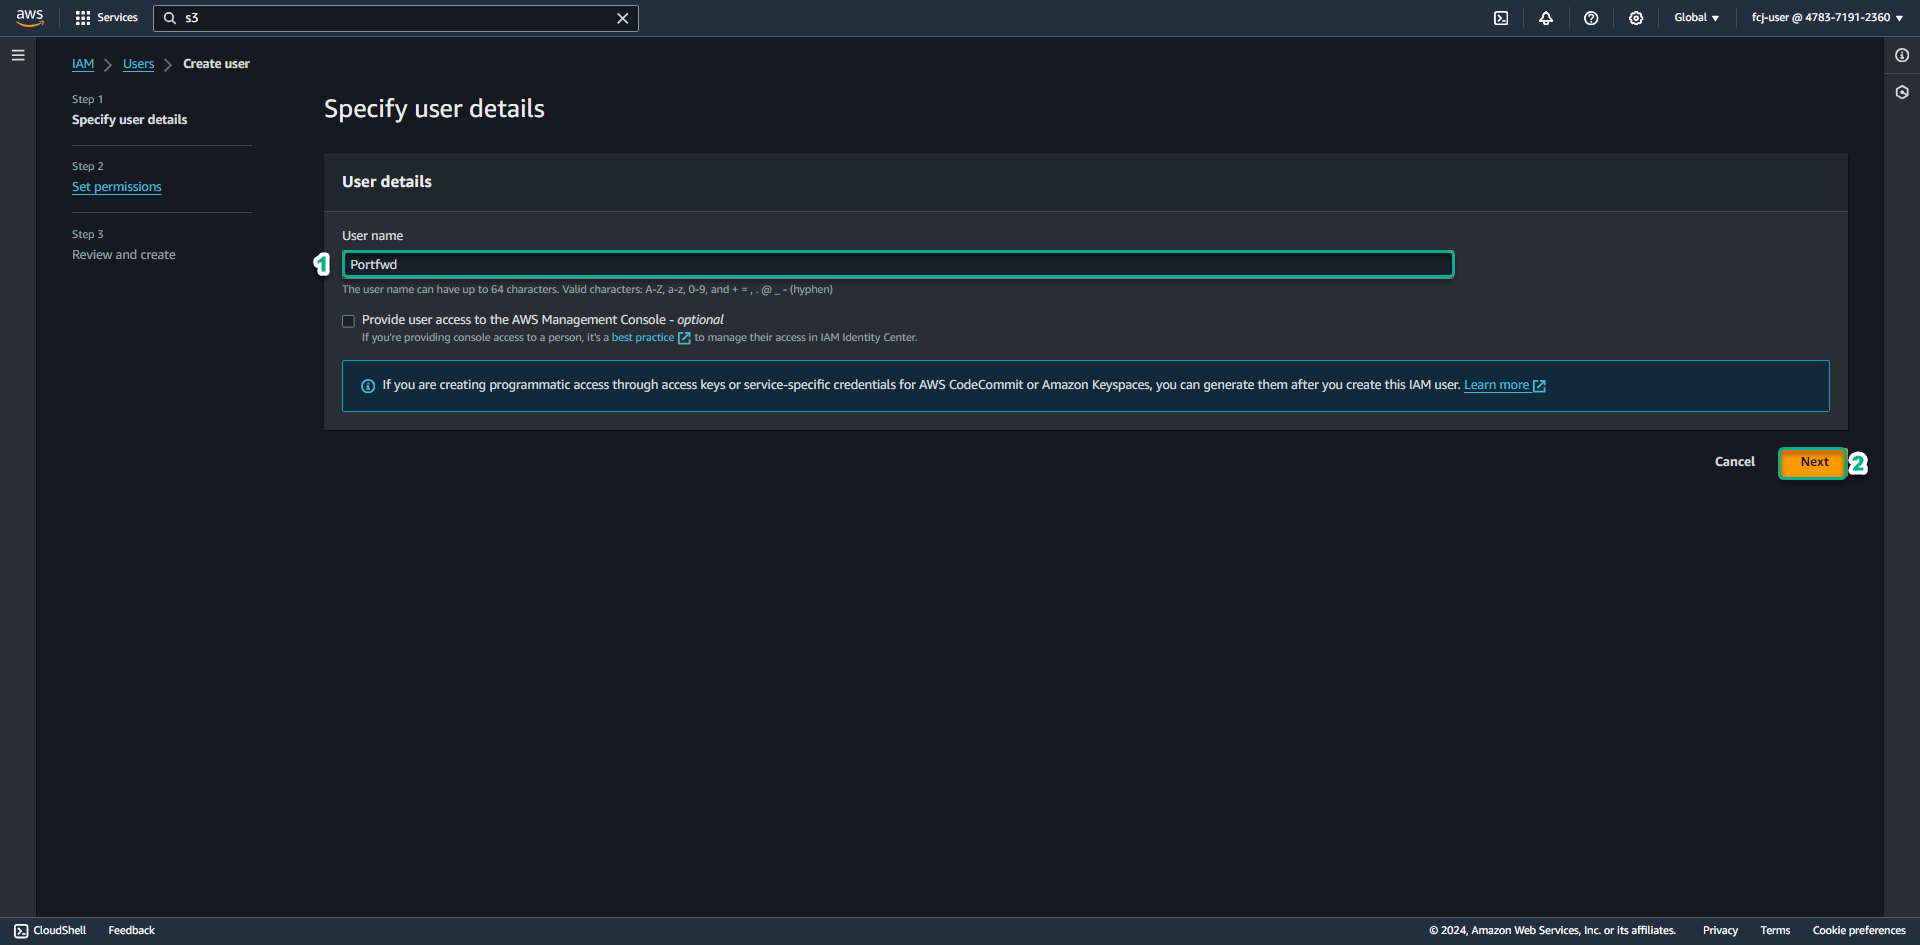
At the Create user page.
- In the User name section, enter Portfwd.
- Click Next.
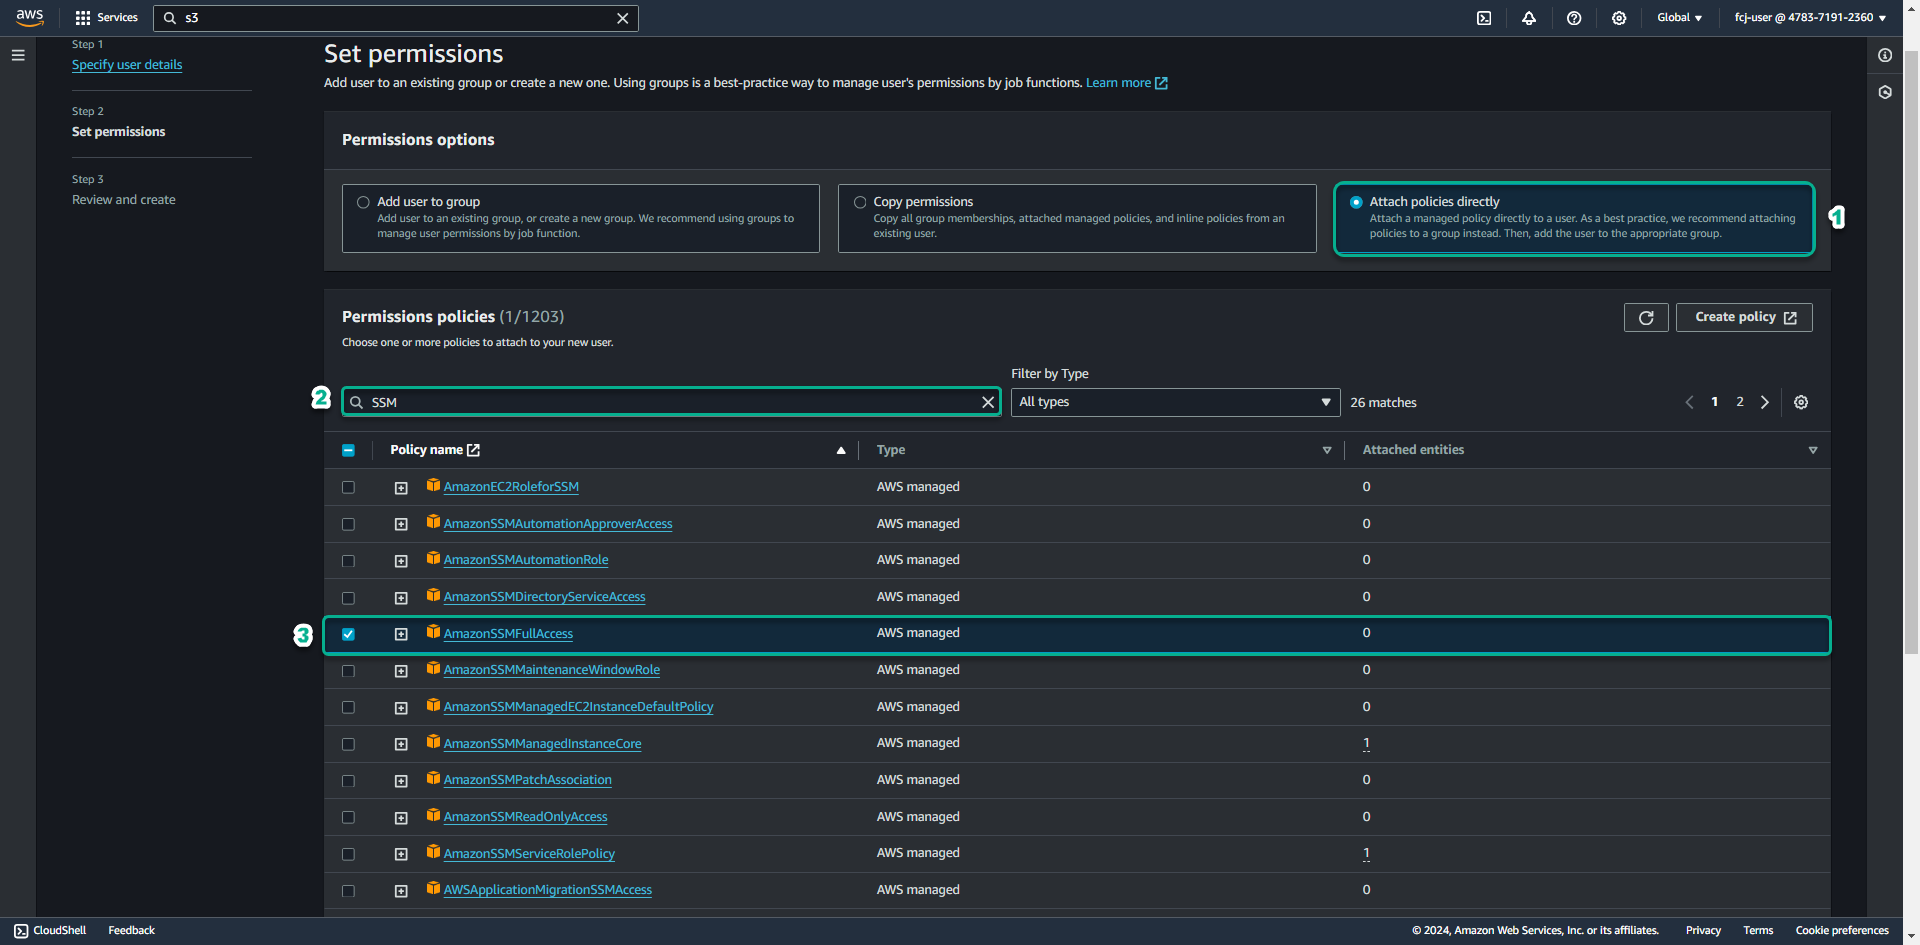
At the Set permission page
- Select Attach policies directly
- In the search bar, enter ssm.
- Click AmazonSSMFullAccess.
- Click Next.
- Click Create user.
Create access key for Portfwd user
- Click Create access key
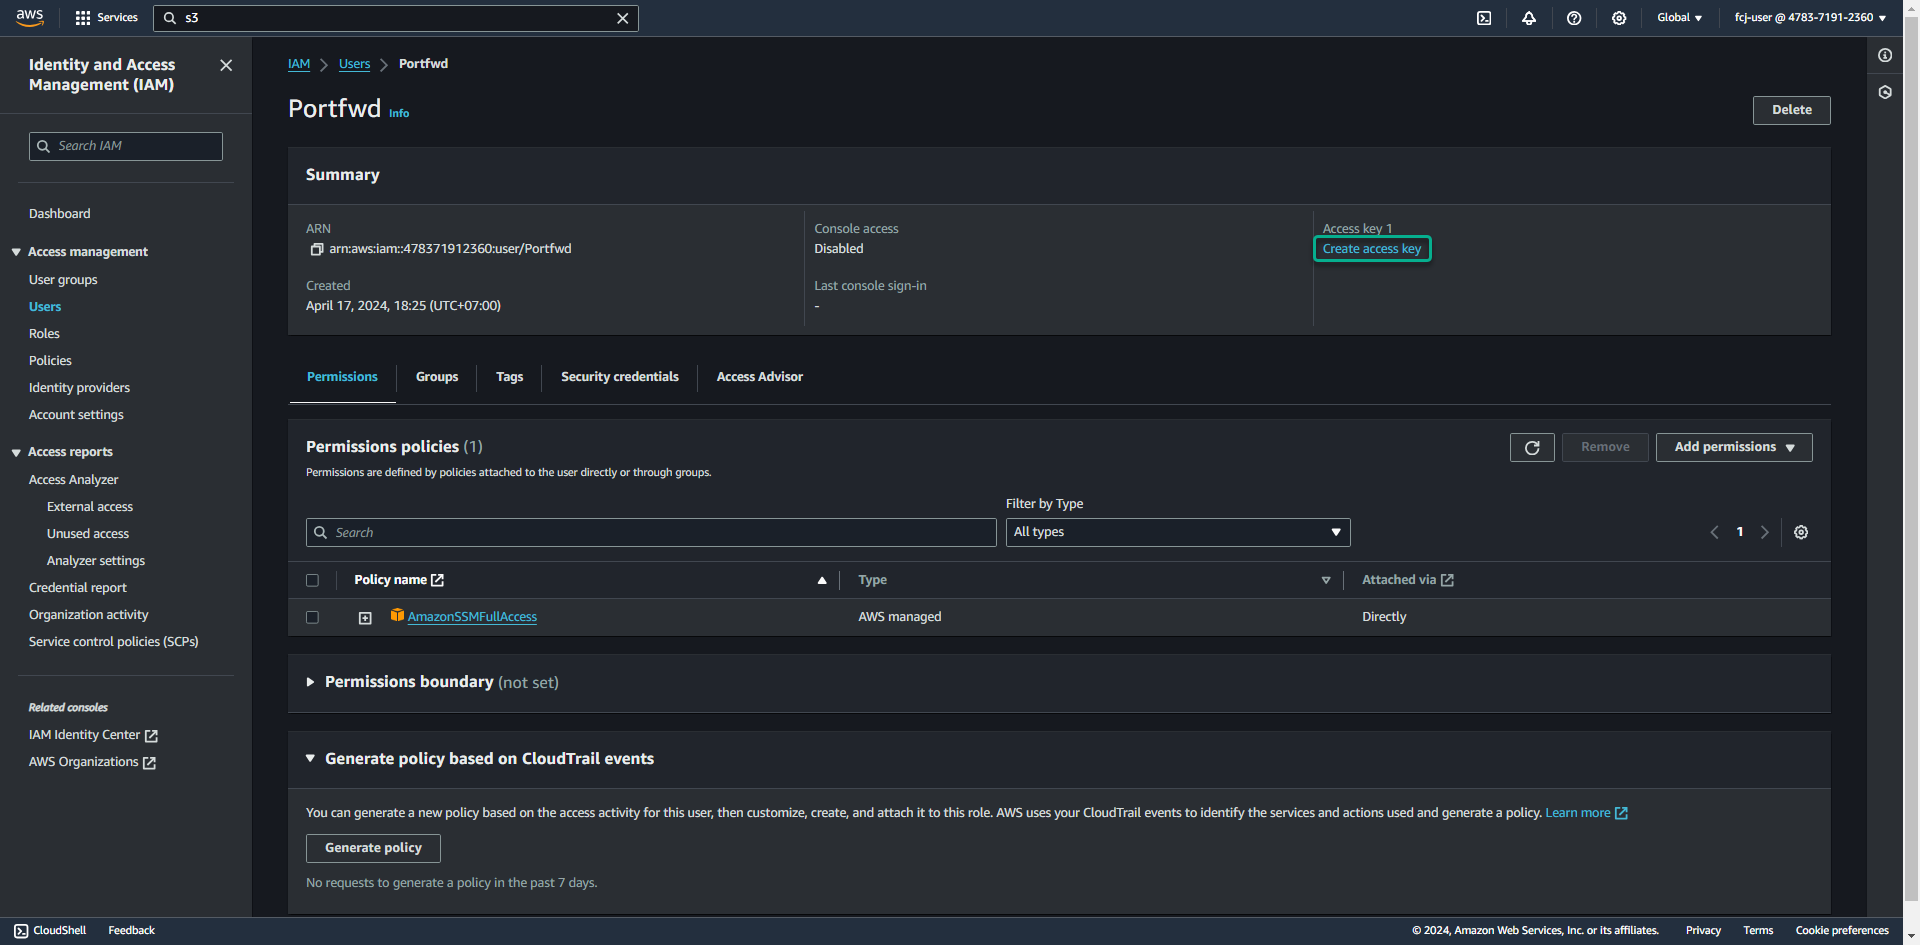
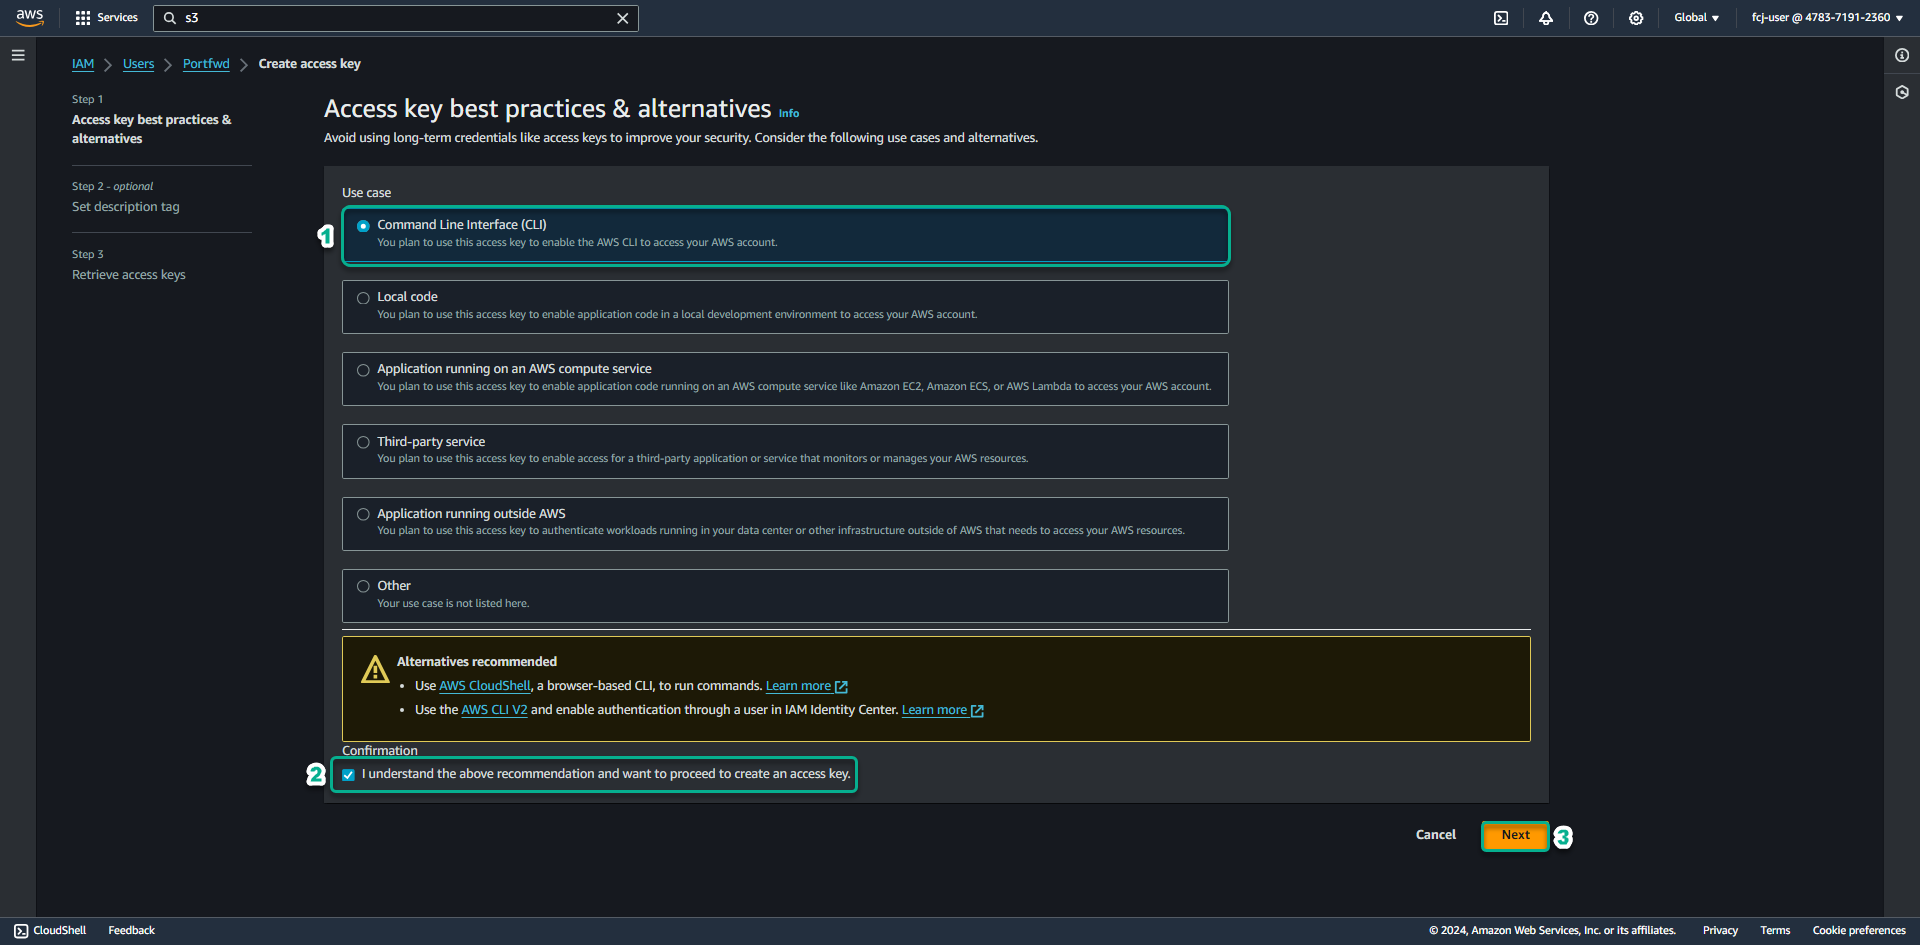
- Select Command Line Interface(CLI)
- Check box confirmation
- Click Next
- Click Create access key
- Click Download.csv file
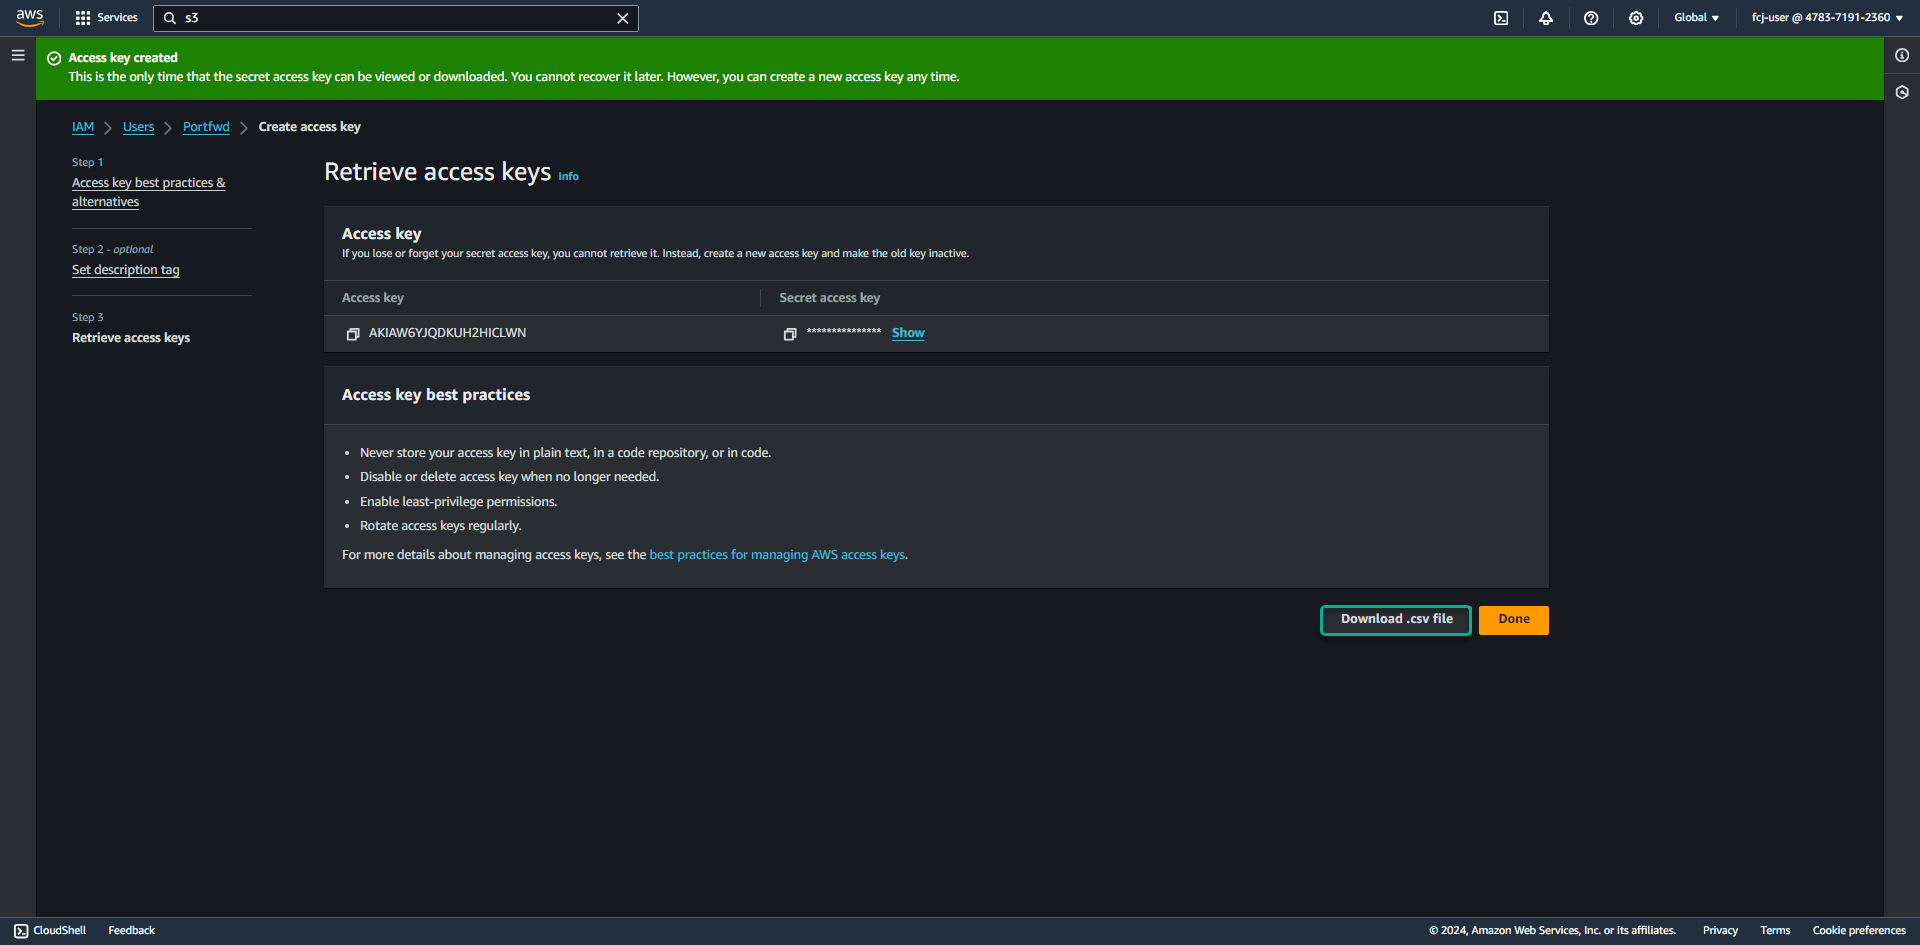 Save the Access key ID and Secret access key information to configure AWS CLI.
- Click Create access key
Install and configure AWS CLI and Session Manager Plugin
To perform this part of the lab, ensure your workstation has installed AWS CLI and Session Manager Plugin
You can refer to an additional lab on installing and configuring AWS CLI here.
For Windows, when extracting the Session Manager Plugin installation folder, run the install.bat file with Administrator privileges to perform the installation.
Perform Port forwarding
- Run the command below in the Command Prompt on your machine to configure Port Forwarding.
aws ssm start-session --target (your ID windows instance) --document-name AWS-StartPortForwardingSession --parameters portNumber="3389",localPortNumber="9999" --region (your region)
The Instance ID information of the Windows Private Instance can be found when viewing the details of the Windows Private EC2 Instance.
Example command
C:\Windows\system32>aws ssm start-session --target i-06343d7377486760c --document-name AWS-StartPortForwardingSession --parameters portNumber="3389",localPortNumber="9999" --region ap-southeast-1
If your command reports an error like below:
SessionManagerPlugin is not found. Please refer to SessionManager Documentation here: http://docs.aws.amazon.com/console/systems-manager/session-manager-plugin-not-found
It means you have not successfully installed the Session Manager Plugin. You may need to restart the Command Prompt after installing the Session Manager Plugin.
Connect to the Private Windows Instance you created using the Remote Desktop tool on your workstation (open the built-in Remote Desktop Connection app on Windows).
- In the Computer section: enter localhost:9999.
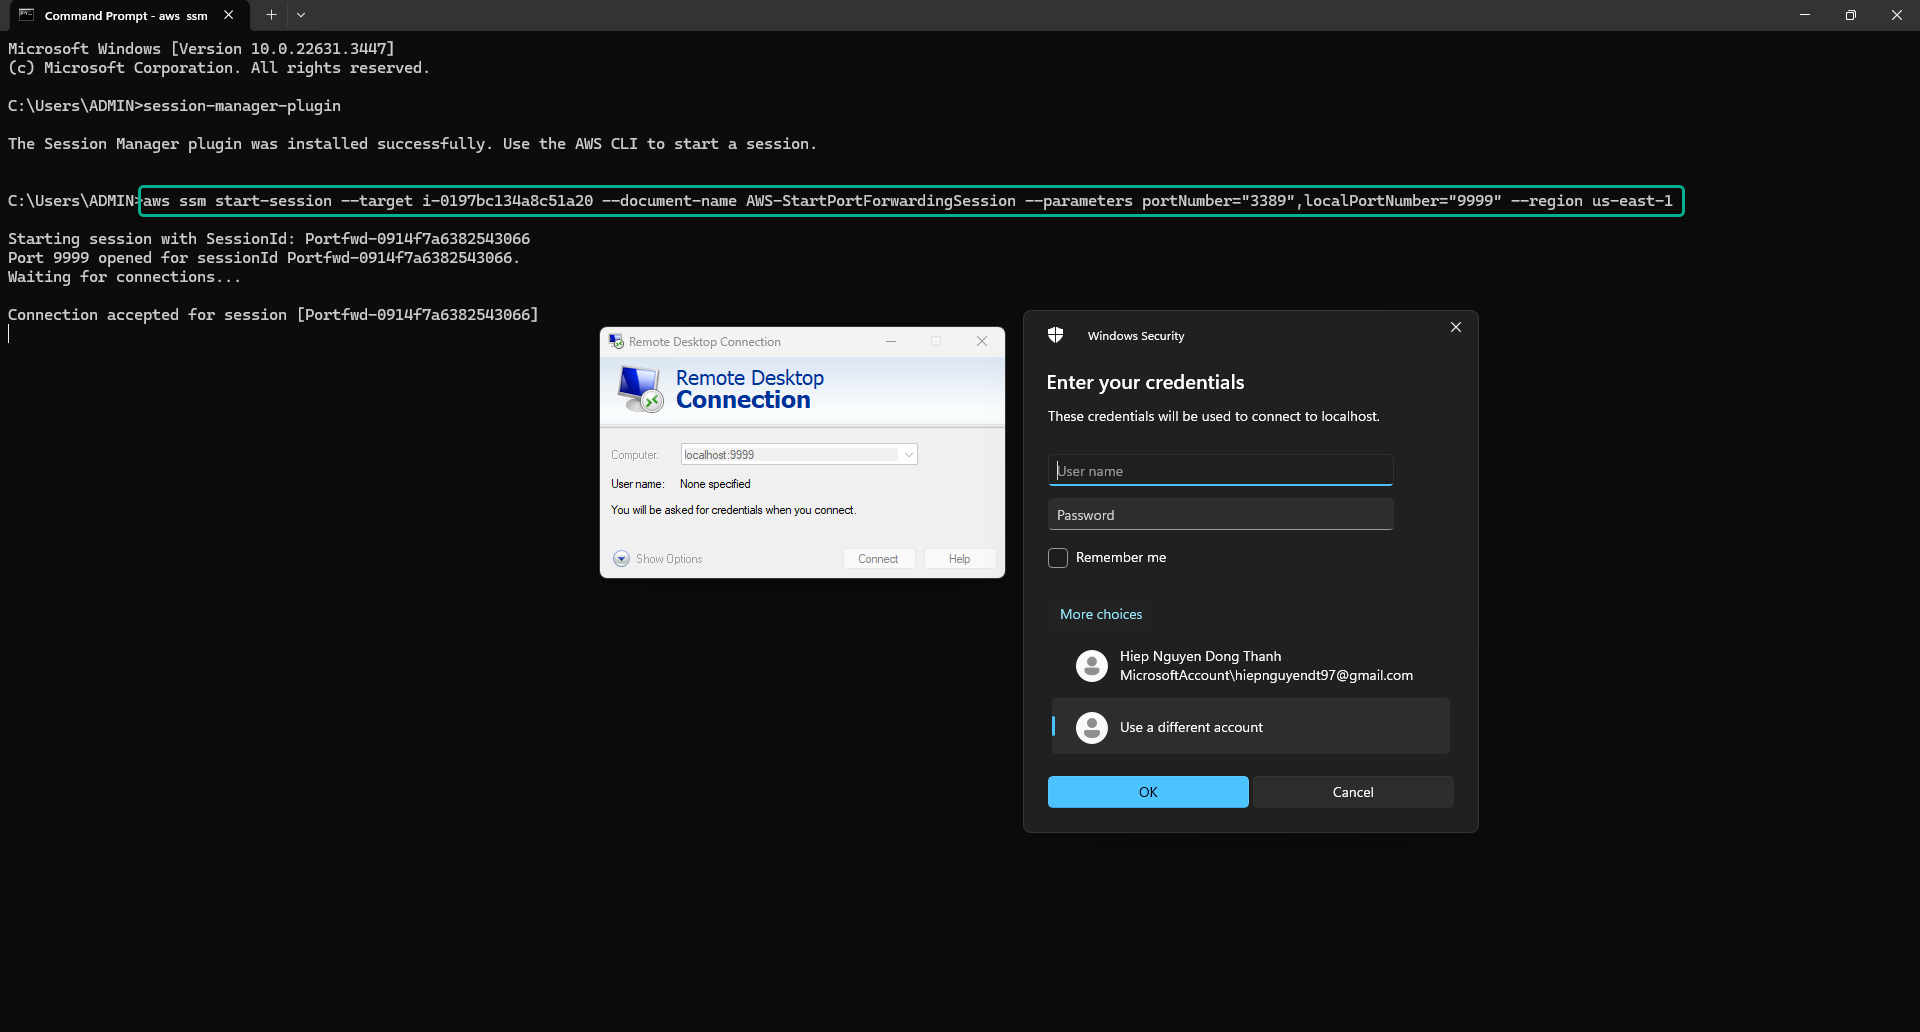
- Then press ctrl + C to disconnect.
- In the Computer section: enter localhost:9999.
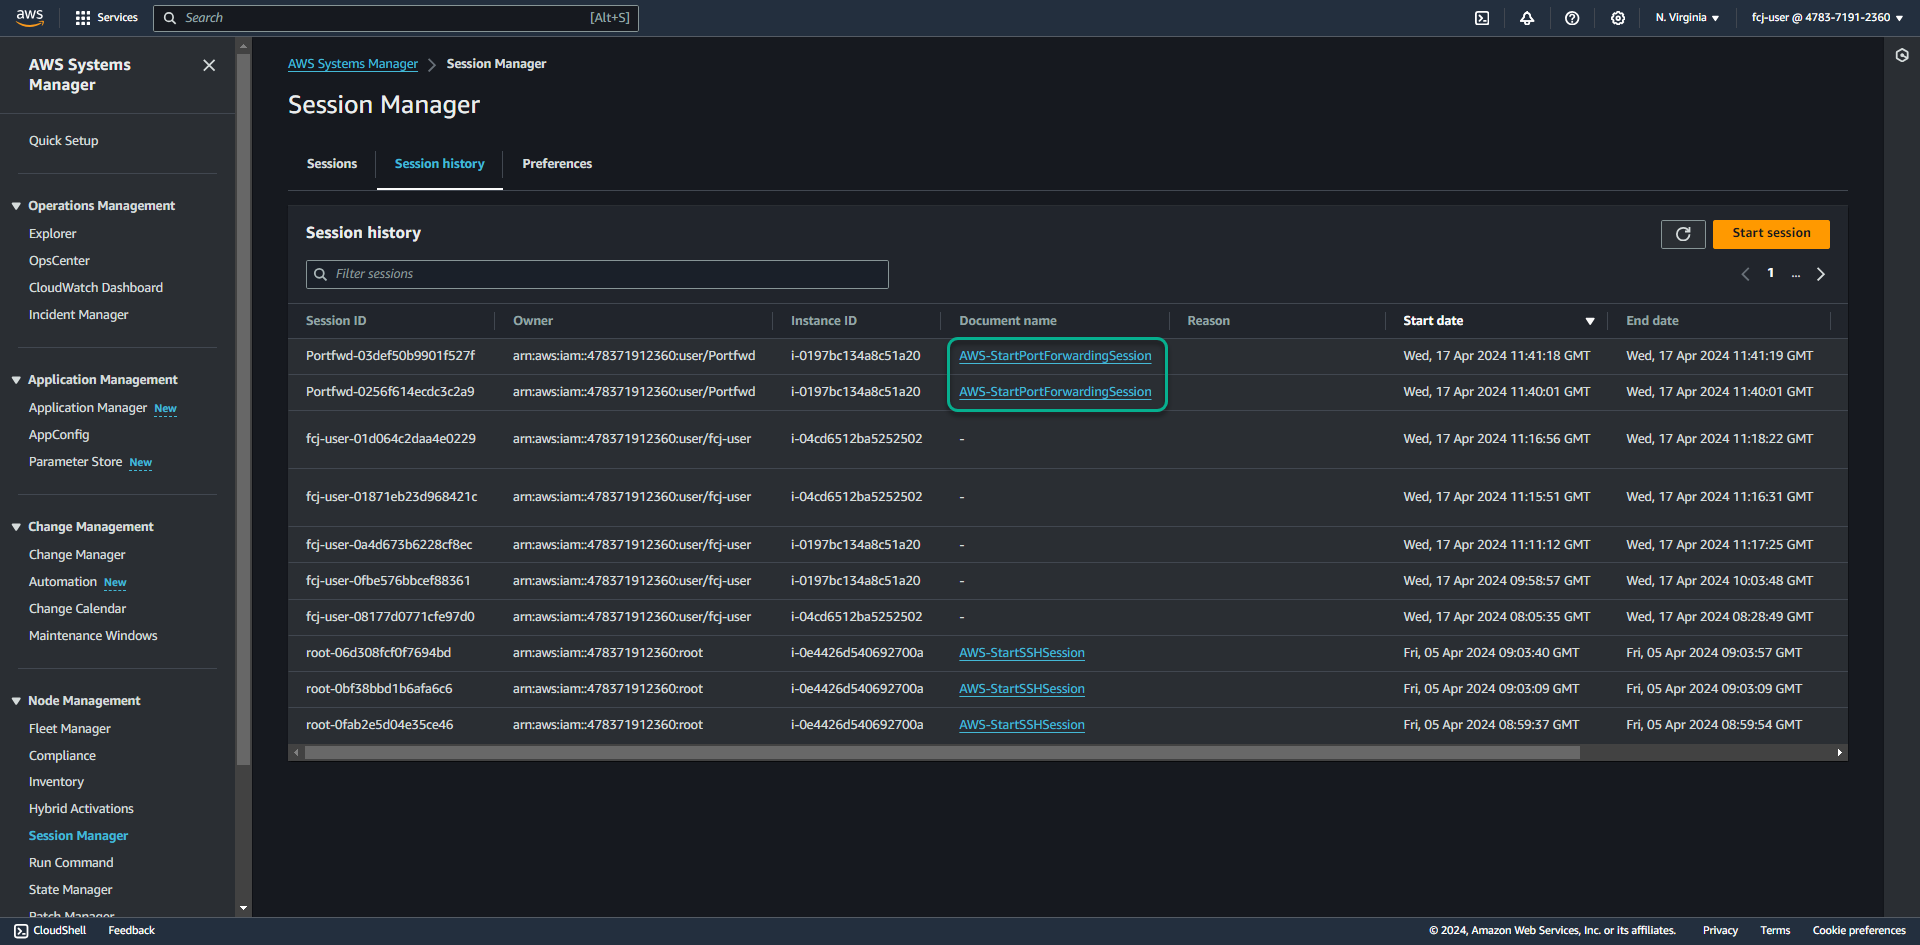
Return to the Systems Manager - Session Manager service management console.
- Click the Session history tab.
- We will see session logs with the Document name AWS-StartPortForwardingSession.
Congratulations on completing the lab guiding how to use Session Manager to connect as well as store session logs in an S3 bucket. Remember to clean up resources to avoid incurring unexpected costs.